Guest post: Shooting film in Cambodia (Rocco)

Note:  This post is written and all photos by Rocco Paduano who attended both our Street Photography and Cambodia workshop over a period of two weekends.  Rocco is partial to film cameras as well as his digital M9, this trip he took both, this is his story. - Gary Tyson, Director F8 Photography.

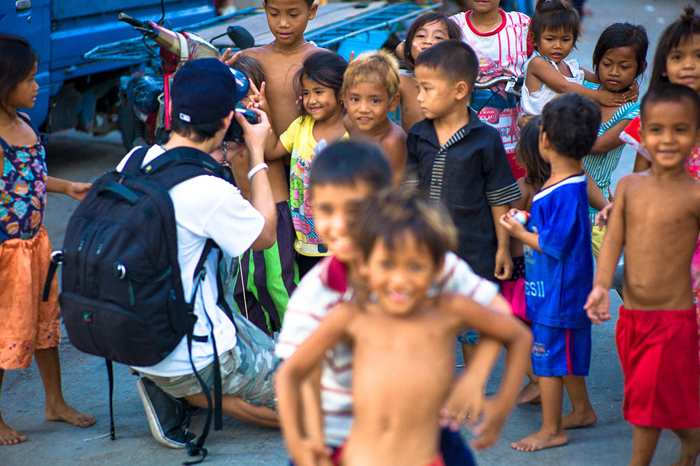
(Playful children jump onto our Tuk Tuk, Leica M9, 35mm)

It was with great anticipation that I awaited being able to spend five full days in Phnom Penh along with Gary Tyson from F8 Photography, Ranjit, and Trevor Smith on a travel photography workshop in Phnom Penh, Cambodia.

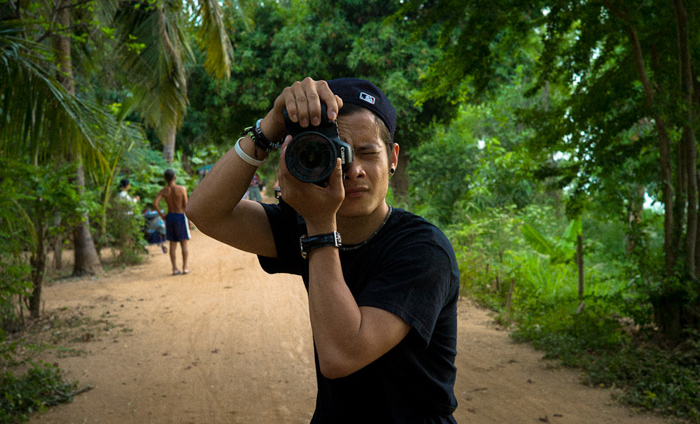
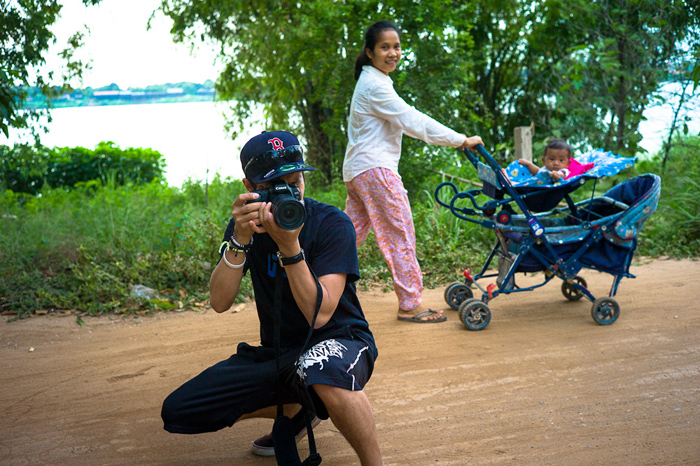
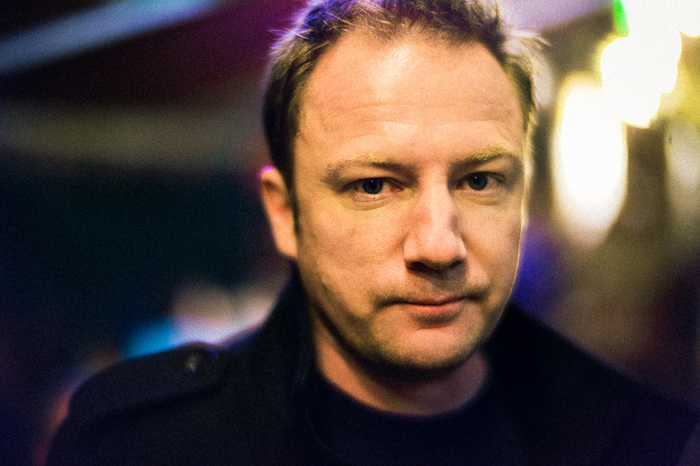
(The author, Rocco Paduano in Phnom Penh)

As a veteran of the Hong Kong Street Photography workshop, which Gary organised with Eric Kim, I could not wait to put some of the knowledge gained to test in and around Phnom Penh.  However, I did not want to just document random images of life in such a colorful city.  I wanted to be able to tell a ‘story’, and somehow begin to build some consistency in the types of pictures I was producing therefore I am hopeful that I am moving in the right direction.

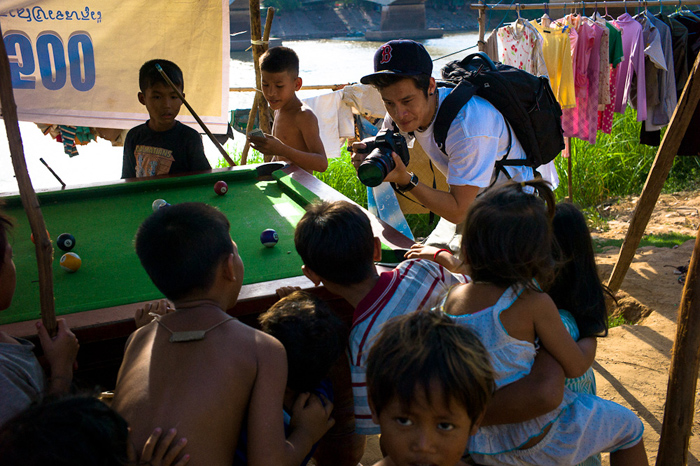
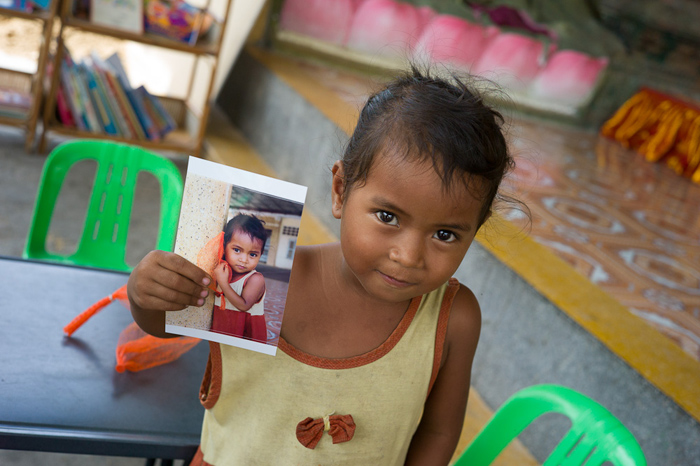
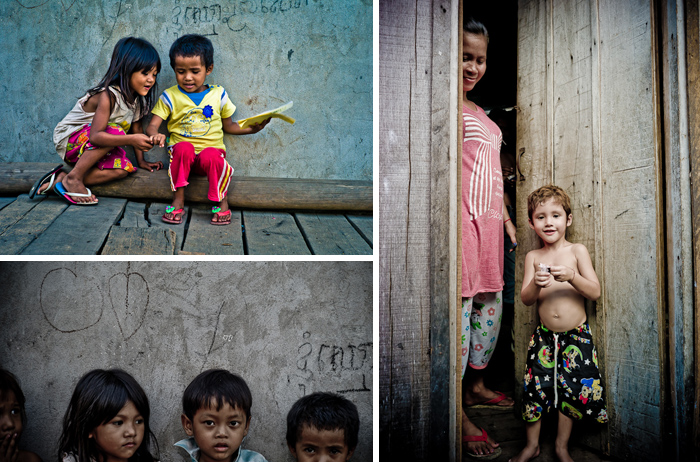
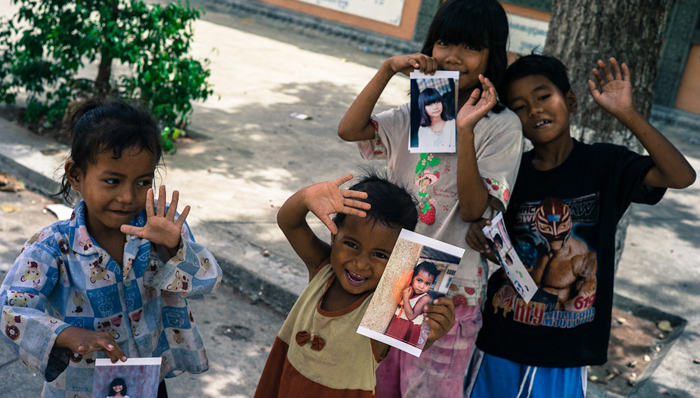
(Taking a break from reading lessons at a local Wat for a photo, Leica M9, 35mm)(Giving back pictures was priceless, Leica M9, 35mm)

Cambodia is a daunting place to say the least.  As one of the poorest South East Asian nations, ravaged for the better part of the 20th century by different conflicts, it was witness to one of the single most brutal acts of genocide humans ever inflicted on each other.  One reads about the rule of the Khmer Rouge between 1975 and 1978, and one can only imagine what the Cambodian people had to endure in the name of totalitarian ideologies.
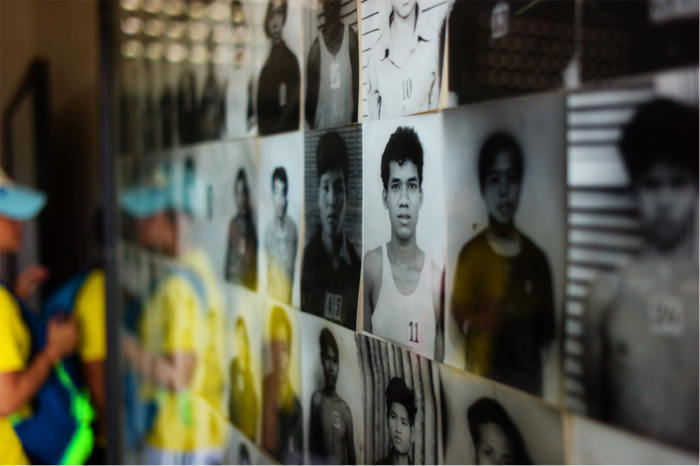
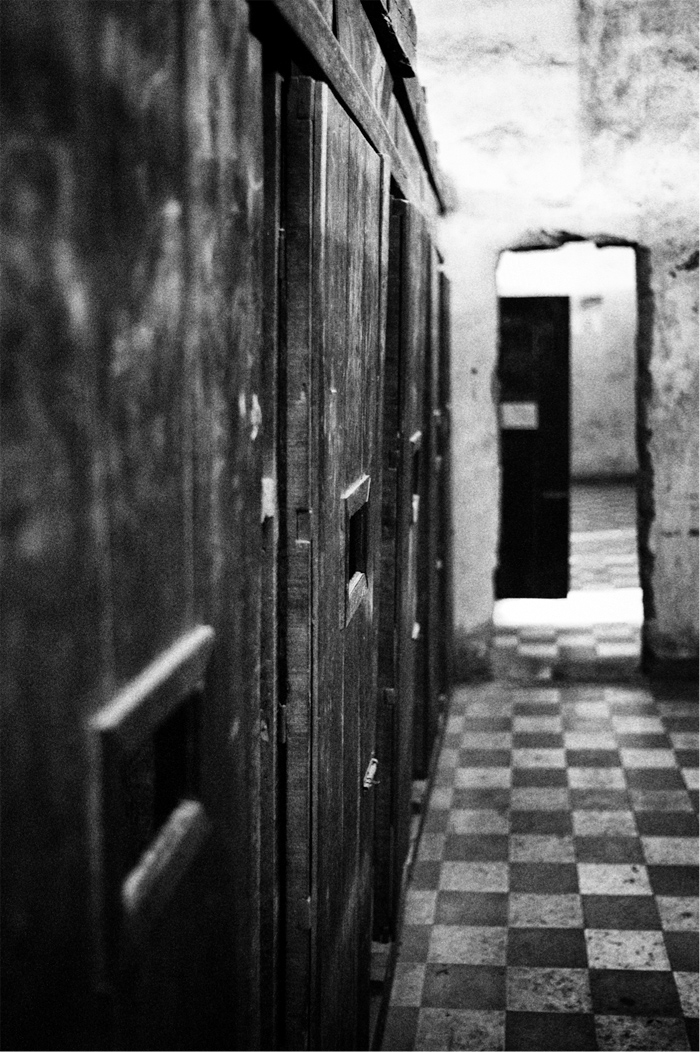
(Pictures of genocide victims at Tuol Sleng S-21, Leica M9, 35mm)(Interrogation room at Tuol Sleng S-21, Leica M9, 35mm)(Confinement cells at Tuol Sleng S-21, Leica M9, 35mm)
However, today the country is young (approximately 50% of the population is below 22 years of age), full of hope, and full of smiles.  As photographers seeking to hone our skills and to explore a life beyond our own, we were always welcomed with a smile and a “hello”, mostly by people living on the fringes of society.

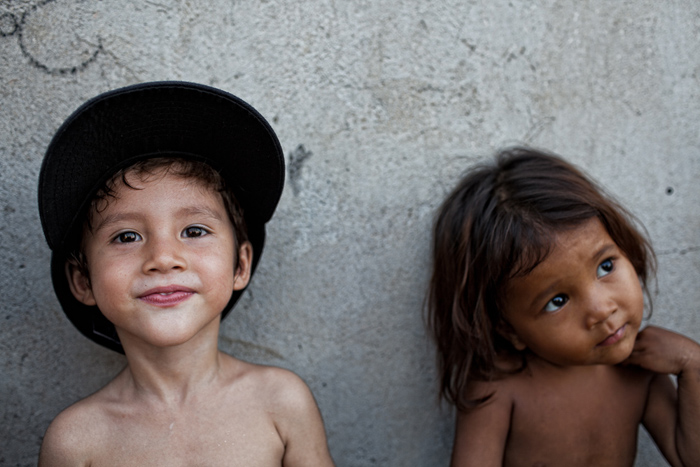
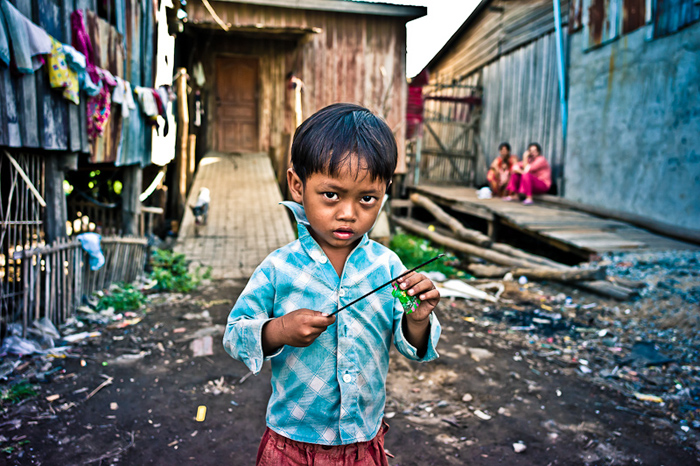
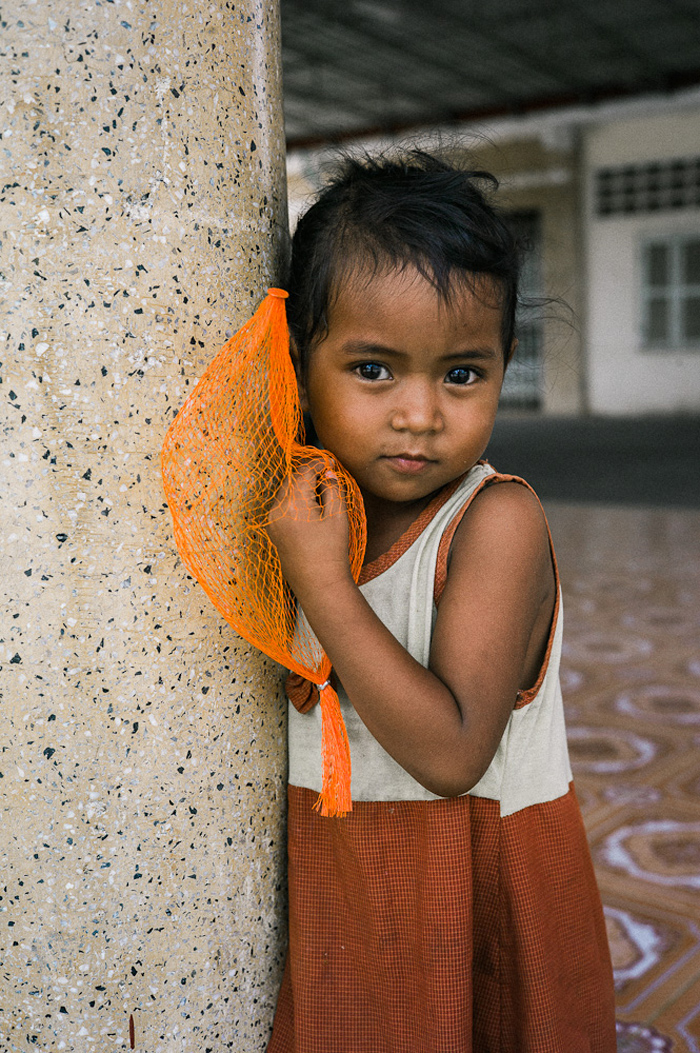
(Young child from a poor neighborhood near Phnom Penh train station, Leica M9, 35mm)

I originally envisioned doing most of my shots in black and white, in good old ‘street photography’ style.  However, I soon realized that ‘street photography’ takes on a whole new meaning in Phnom Penh.  People pose for you.  They want their picture taken, thus making the whole notion of ‘street photography’ much harder to define in the usual context.  We migrated towards a photographic style that was more ‘documentation’ (or as Gary would call it, ‘environmental portraiture’), than candid ‘street photography’.

(Street fruit vendor, Leica M9, 35mm)

Amazingly, while shooting in poor neighborhoods, we all realized that we were inundated with color.  From the shadows cast in tight alleyways, to the color of the unpaved roads, and that of the clothing worn by the people, it did not seem as if we would be doing any justice by capturing these images in black and white.  I shot digital with an M9, and film with an FM3a.  Although I took many shots with the M9, I found that the pictures that talked to me the most came from the FM3a.  Color slide and black and white films have characters of their own and add a unique personality to the image (assuming the exposure is correct).
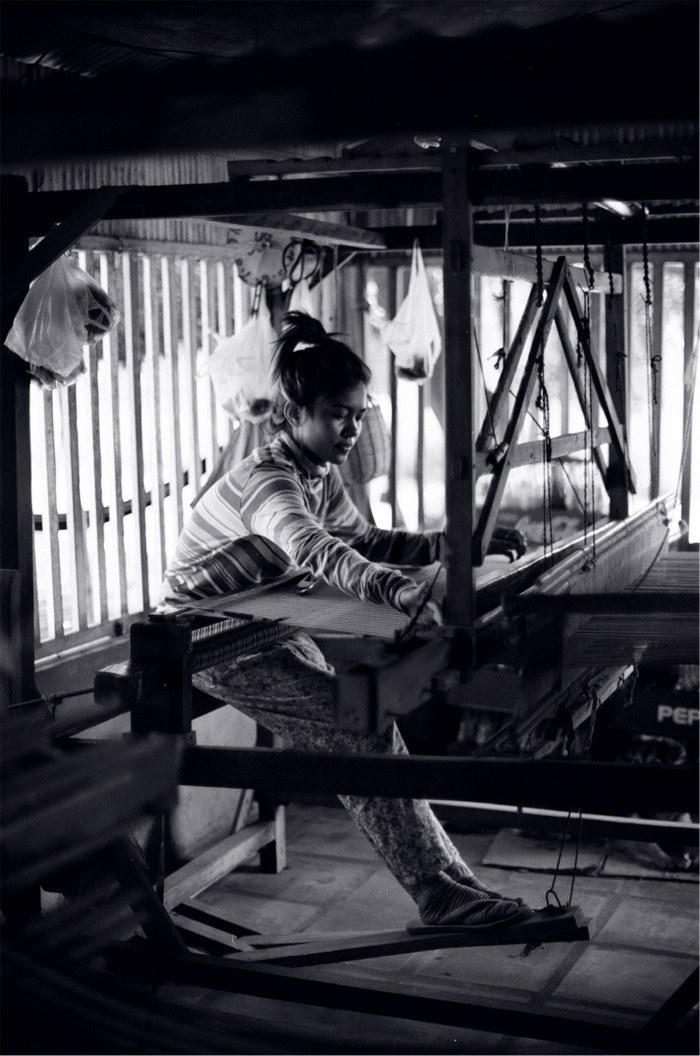
(Making sarongs the old fashioned way, Nikon FM3a, 50mm, Kodak BW400CN)
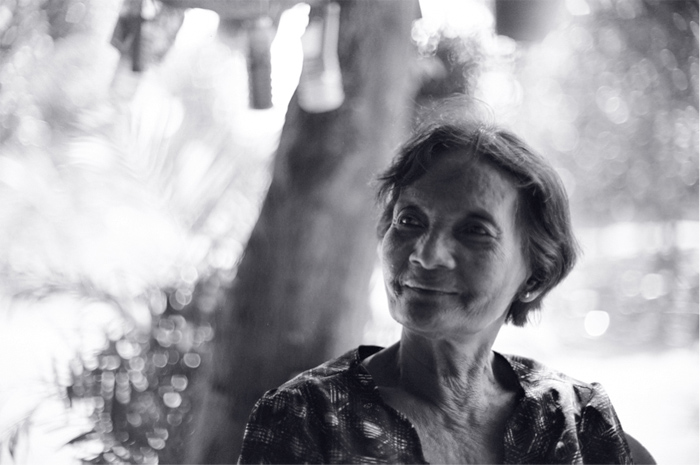
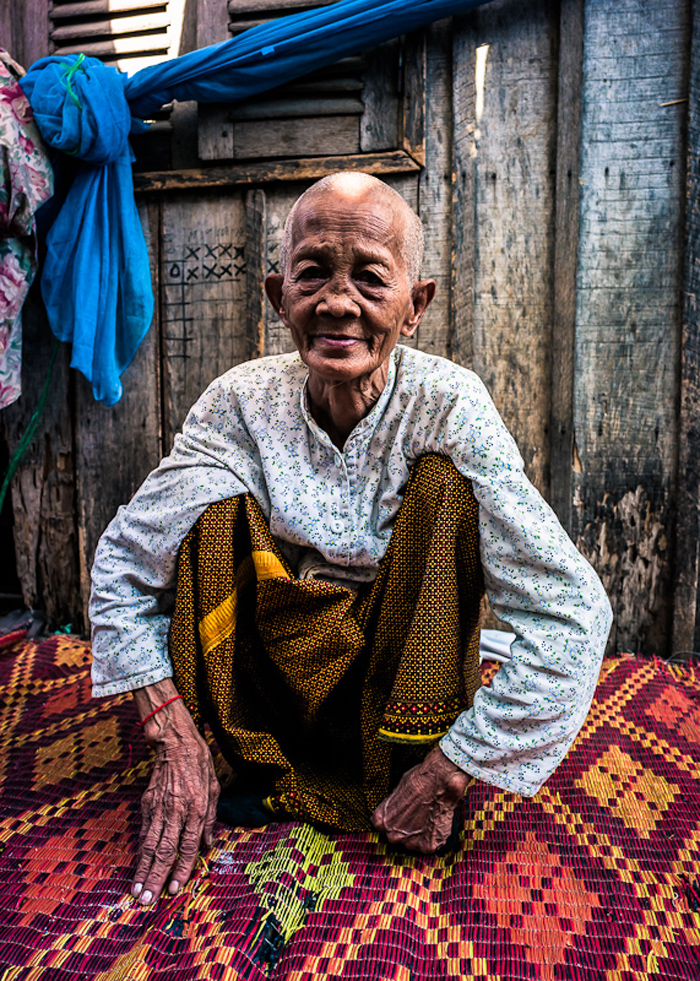
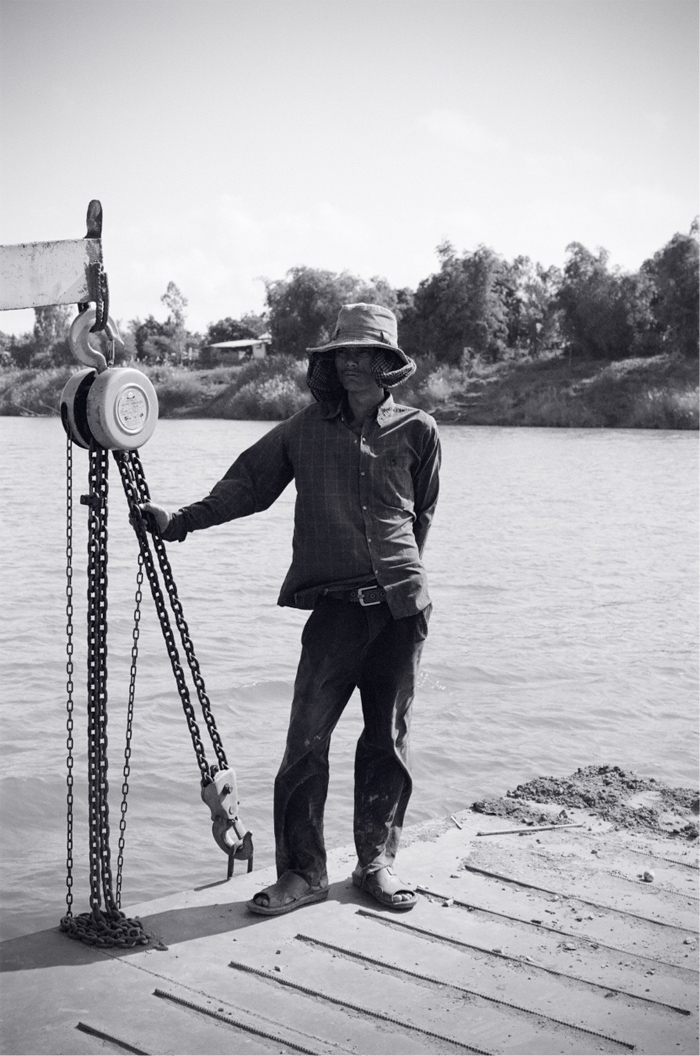
(Old villlage woman, Nikon FM3a, 50mm, Kodak BW400CN)(Ferry boat hand, Nikon FM3a, 50mm, Kodak BW400CN)
 Our trip started out just right, as we congregated at the Foreign Correspondents’ Club along the Mekong River; a place that has hosted numerous war photographers as they documented Cambodia’s turbulent history.  There was no shortage of inspiration as the walls of the FCC are covered with past and present images of Cambodia and its people, through war and peace.
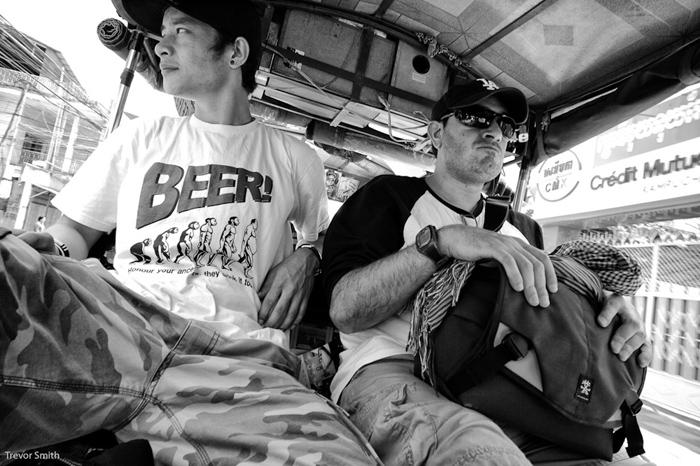
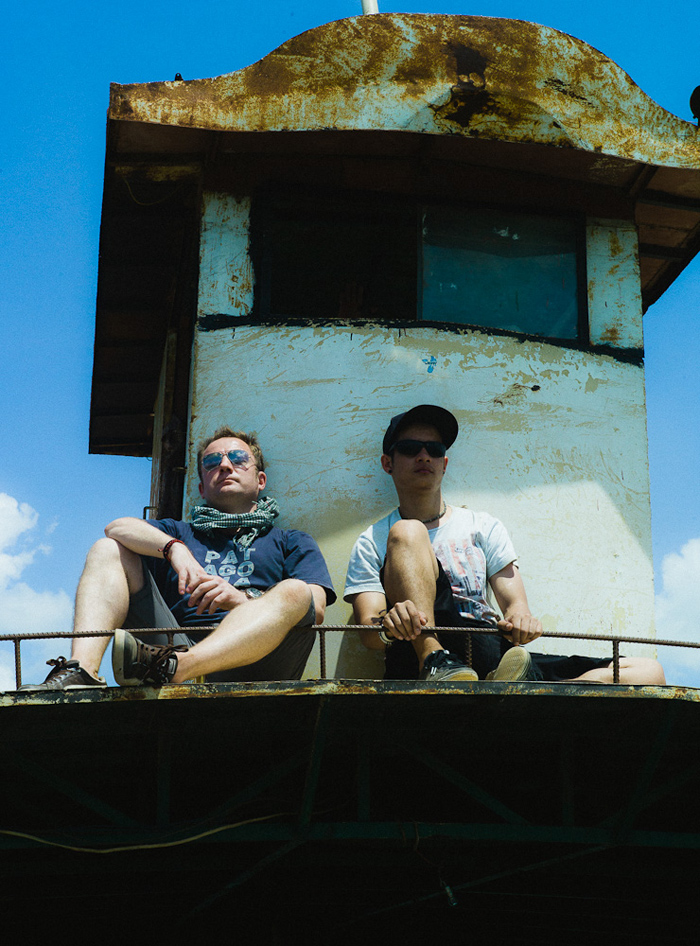
(The author Rocco (right) with RJ in the Tuk Tuk out looking for photo opportunities)
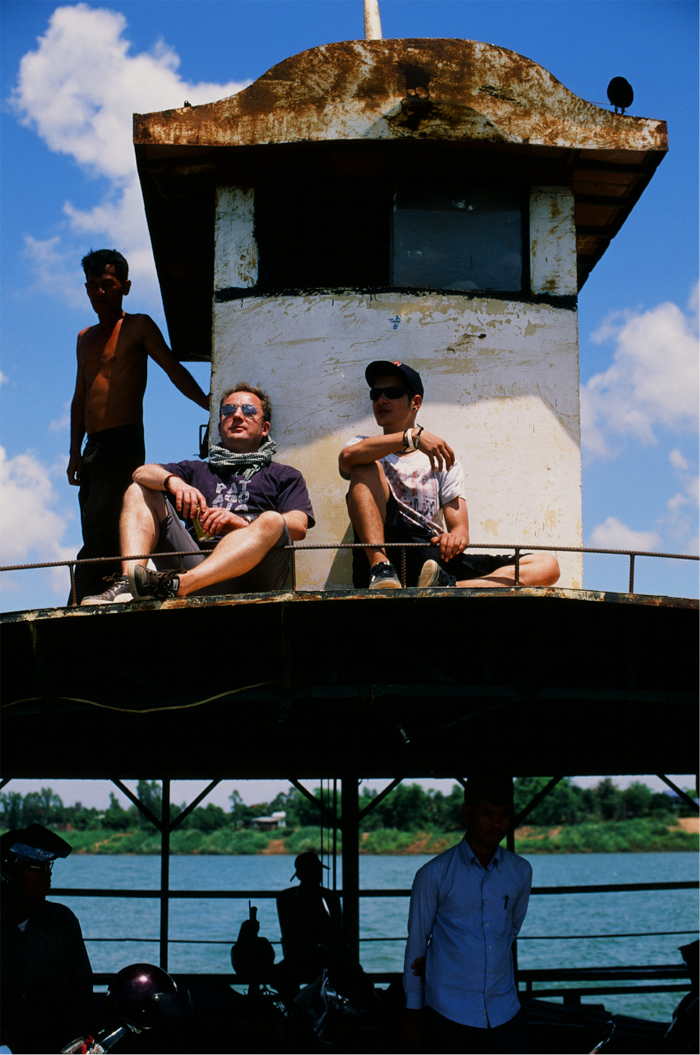
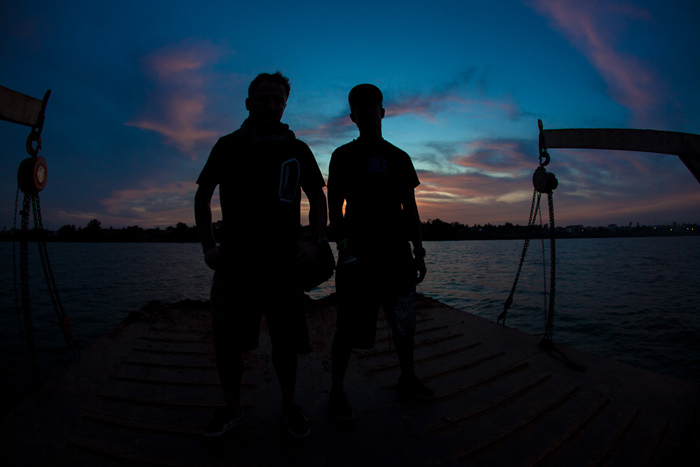
(Gary and Ranjit taking a break with the Captain whilst crossing the Mekong, Nikon FM3a, 50mm, Fuji Velvia 50)

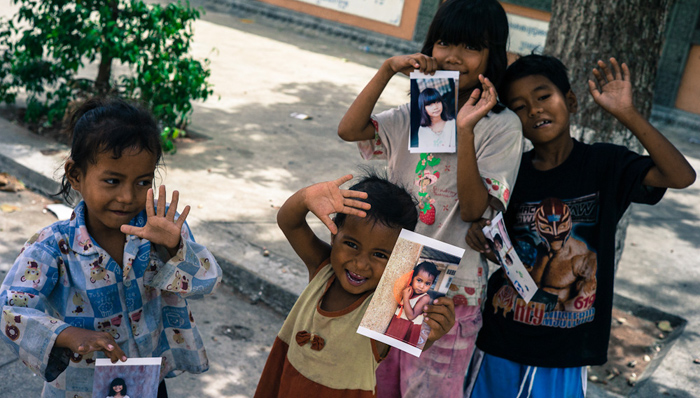
With that, we embarked over the next five days into outings that would surround us with a reality somewhat foreign to us.  Between poor city neighborhoods, Wats and Buddhist monks, villagers and farmers on the outskirts of the capital, there was no shortage of smiles, new friendships, and plenty of experiences.  There was, however, a shortage of photo paper and photo ink, which was rectified by a quick visit to the local Canon supplier.  Being able to give an instant print of the pictures we were taking allowed us to give something back to the very same people that gave us so much visual inspiration.  It brought them closer to us, and allowed us to establish a connection with them even through our language barriers.
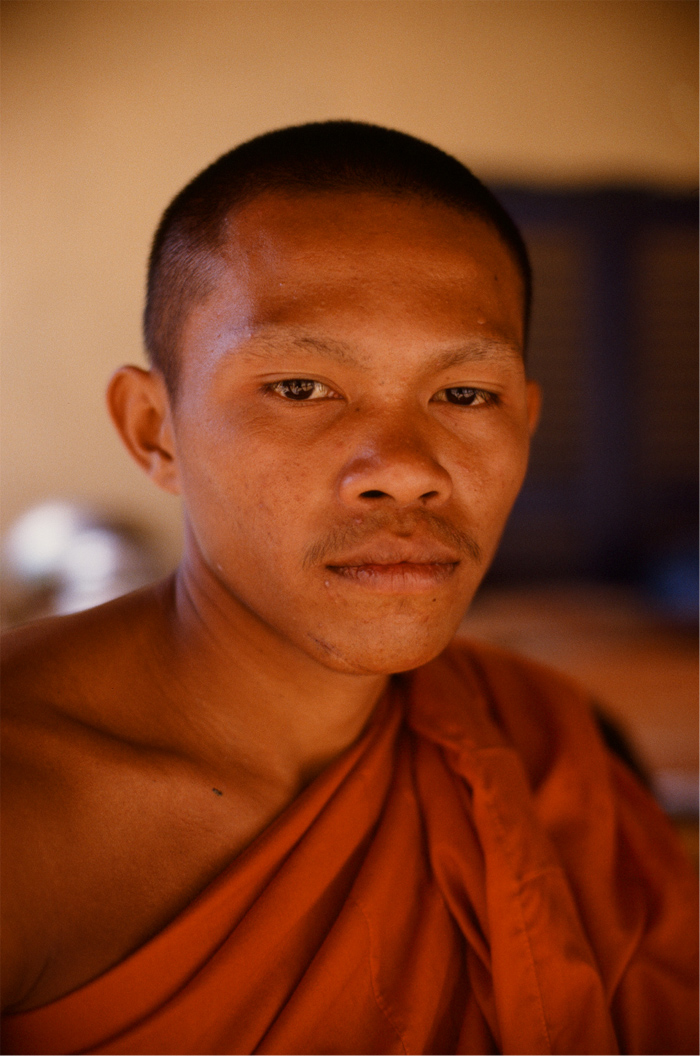
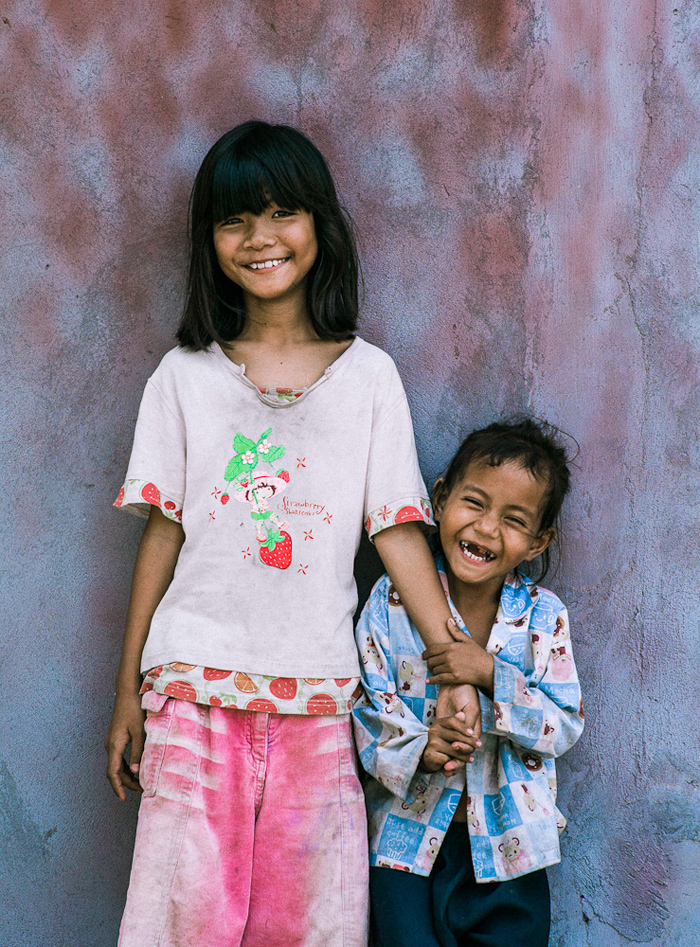
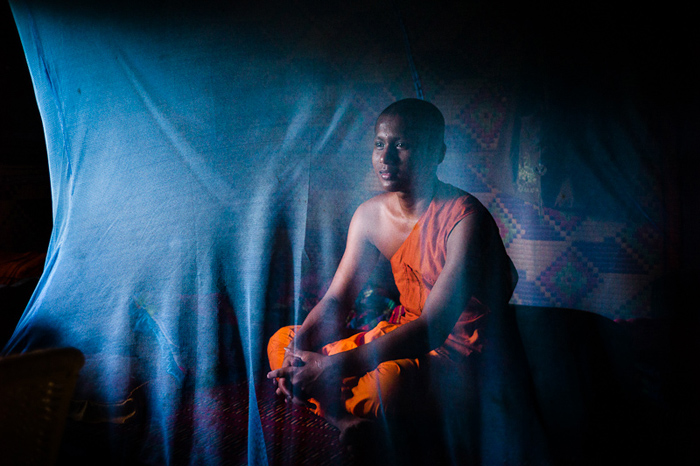
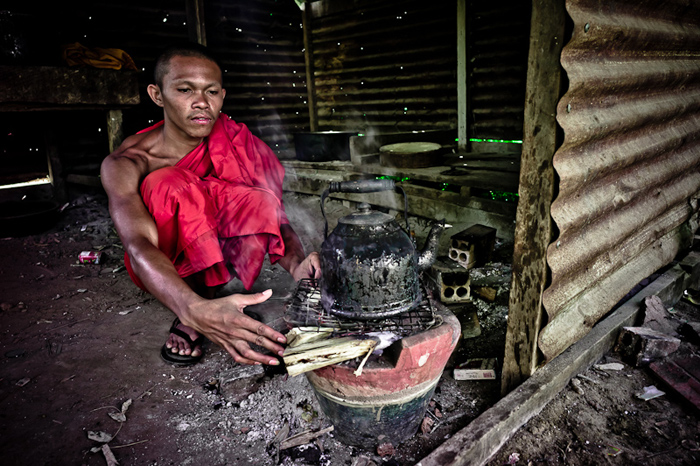
(Young monk, Nikon FM3a, 50mm, Kodak Elite Chrome 200)(Young village siblings, Nikon FM3a, 50mm, Kodak Elite Chrome 200)(Saffron tunics, Nikon FM3a, 50mm, Fuji Velvia 100F)

 Shooting in Phnom Penh was a totally new experience as to what I have been used to lately.  In Hong Kong people are less likely to pose for you, or even take the time to pay any attention.  Thus, ‘street photography’ takes on a different style; furtive and stealthy, candid and more likely to be black and white.  There are a lot less smiles in Hong Kong, and a lot more chances of a ‘confrontation’ with someone that does not want their picture taken.  It is a stark contrast to what we were faced with in Phnom Penh, where people with relatively little smiled and were happy to share a sliver of their lives with us.

(Old village man, Nikon FM3a, 50mm, Fuji Velvia 100F)(Proud father, Nikon FM3a, 50mm, Fuji Velvia 50) (A great way to end the day! Nikon FM3a, 50mm, Fuji Velvia 50)
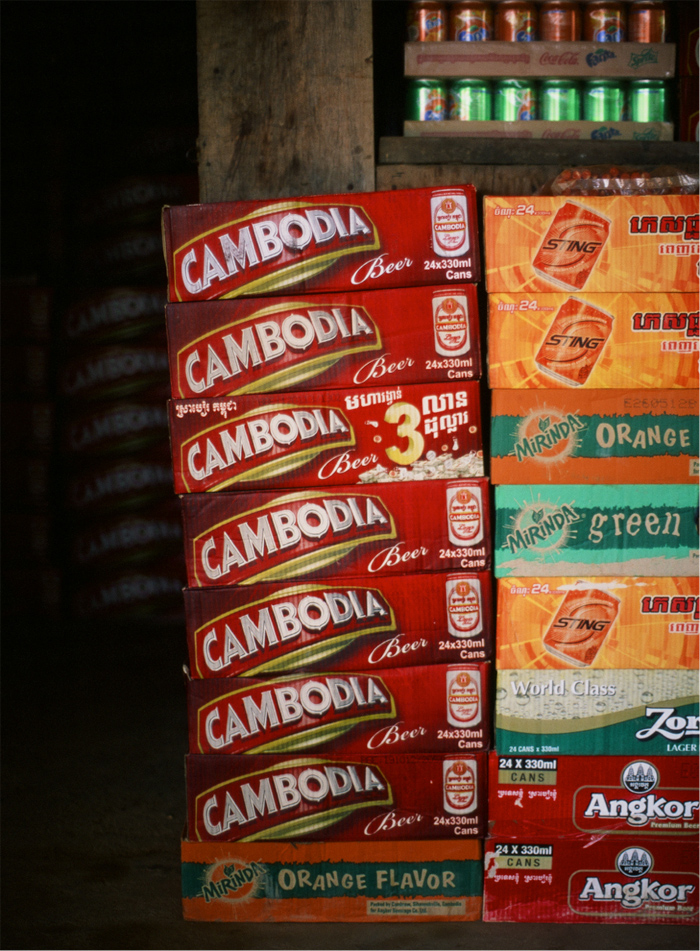
As we returned to Hong Kong, I am sure all of us contemplated the past five days.  Phnom Penh and its people certainly left a mark, and gave us a different perspective even on our own reality.

Final note from F8:

Gary, the Director of F8 has also written a blog post about his experience, that can be seen by clicking here.

Another of the workshop attendees, Trevor, has also written a blog post about his experience, you can read that here.

Also, Gary's assistant RJ wrote a blog post about the same trip, that can be found here.

Thanks for taking the time to visit our blog, if you like our blog and website, please ‘like’ us on our public Facebook page and share this story with your friends with the Facebook and twitter links below.  You can also subscribe to our blog via the RSS link below.

F8 Photography provides commercial photography and training across Asia, with workshops on Street Photography and other photography and video training courses, more details can be found via the ‘courses and workshops’ link and upcoming events via the front page of our website.

Guest Post: My Cambodia experience (Trevor)

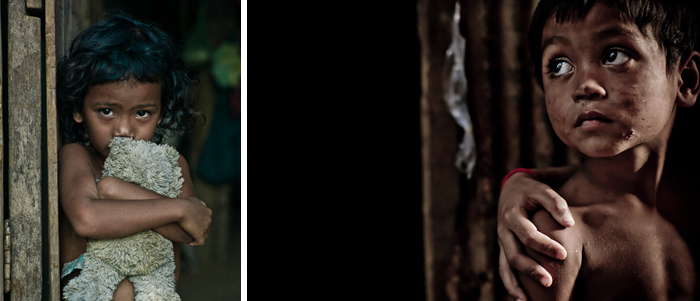
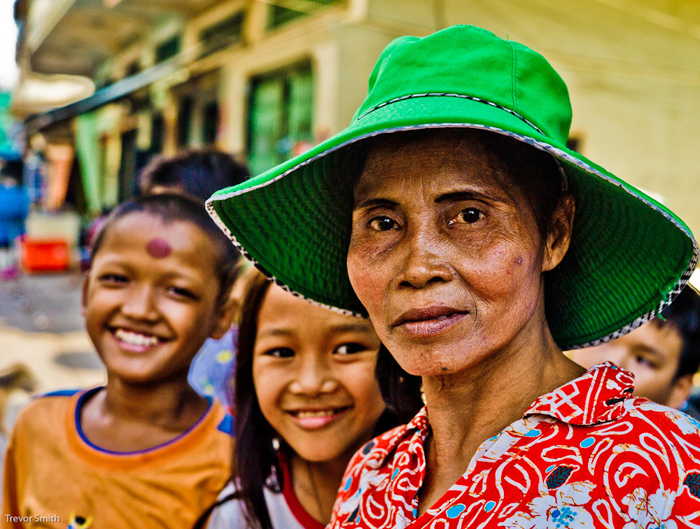
Note:  This post is written and all photos by Trevor Smith who attended both our Street Photography and Cambodia workshop over a period of two weekends.  Trevor works in Saudi Arabia so had a long journey to be with us, this is his story. - Gary Tyson, Director F8 Photography. (The eyes are the window to the soul...)

After a weekend with Gary Tyson of F8 Photography and rising street photographer Eric Kim on their street photography workshop in Hong Kong, I was brimming with confidence and keen to test myself armed with new skills as well as explore  a different country which is recovering from an extremely brutal past.

Flights all booked and kit checked we were all set, but sitting in Gary’s office waiting to go to the airport....the flight time was approaching fast and Gary, the consummate professional had to tie up any lose ends before the trip, which almost made us miss the flight, so a mad dash to the airport started off the adventure to Cambodia.

The plane doors opened on the airstrip in Phnom Penh onto a sweltering heat that smacks you in the face.  Eventually through Immigration, customs and red tape we fall out into the night heat and manic road system towards our hotel.

(Weather and light was harsh for many landscapes but I tried where I could)

An early rise the next day for a full days shoot, bright eyed, bushy tailed and excited. After a typical English breakfast (you can take the boy out of England but not the …. Well you know).

Gary recalled what was to be our trusty and faithful Tuk Tuk (Motorbike/Mopeds with carriage) driver (Gary has used him many times on his previous exploits), his orders were find us a typical riverside shanty village along the Mekong.

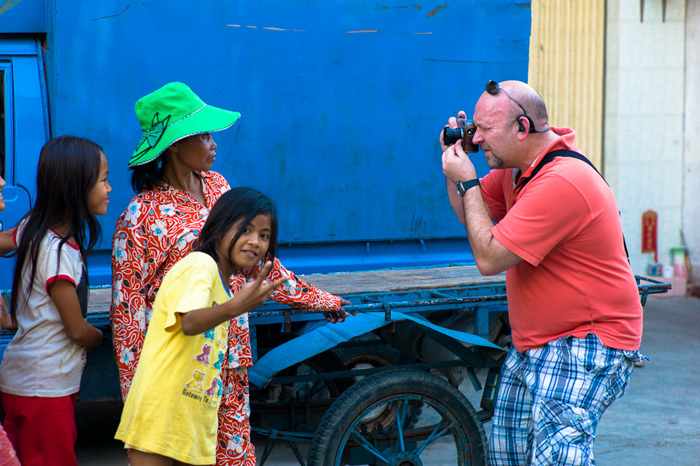
From his vast experience as a Photographer and many visits to Cambodia, Gary briefed us as to the type of photos and the kind of reception we could expect along with all the technical jargon my tiny brain could handle.  Sam (our Tuk Tuk driver acted as translator, explained our presence and intention and always asked people if they minded us photographing them, normally with a promise of a print for them to keep).

(A motley crew...Rocco, RJ, myself and Gary from F8)

It was hugely daunting for me (as well as I suspect for the village dwellers), we were swamped by laughing, excited kids and curious, smiling, coy adults wanting their photos taken by these funny looking people, most are happy to see their face on the LCD screen as this is the closest they will be to being on “TV”, so they were astonished when we gave them a printed photograph.

(kids and villagers around Phnom Penh and Mekong Island)

Two hours whizzed by as did a whole pack of photographic paper used on the portable printer Gary brought along. Photos were dished out to old and young alike and each one was received with pure delight and excitement (what a great idea and a great piece of kit the Canon Selphy 800 printer is).

(Every travel photographer should have one of these printers at all times!)

Back at the hotel we swapped stories and compared images, had lessons on Lightroom and Silver Efex Pro 2), post processing (editing if you prefer), in essence this told Gary what he needed to know about our individual strengths and weaker areas which he could mentor us on, one to one throughout the next few days shooting.

(local villagers greeted us with friendly curiosity)

The next few days were photos, photos and more photos with visits to different villages, markets and pagodas. We also took some time to visit the infamous and very solemn S21 prison and killing fields which I’m not going to dwell on as this was a very sombre experience that contrasts with the vibrance of life now prevalent in Cambodia.

(the infamous S21 prison camp)

One of the days we took a trip to a Buddhist commune, which had lots of homeless people given shelter and food by the monks, this included children that were being schooled when we arrived.  They took (I’m guessing) a welcome break to afford us some photo opportunities.

(children living with the monks at the Pagoda)

Every Buddhist male is expected to become a monk for a period of his life, optimally between the time he leaves school and starts a career or marries. Men or boys under the age of 20 may enter the Sangha as novices nowadays they may spend as little as  1 week or 15 days  to accrue merit as monks. These communes/monasteries are the heart and soul of such communities.

(a very proud child monk)

That particular Monastery was deemed quite “Rich” in comparison to many.  Sam our tuk tuk driver suggested we take a trip onto 'Mekong Island' which was a completely different way of life for both residents and Monks alike much more rural but none the less spectacular and humbling. The moment we arrived (and pushed the Tuk Tuk up the dirt tracked hill) we were greeted by mopeds full (3, 4 and sometimes 5 passengers) of happy, smiling faces that followed us up the track waving all the way and of course riding ahead to tell everyone else. Young and old alike were out waving.

(shooting the kids on the island)

(villagers greet us with Gary from F8 in the background shooting us working)

After several interesting photo opportunities along the way we arrived at the “poor monastery” which looked deserted less a strong looking old man sweeping the courtyard. Sam did his thing and the old gent said it was okay to take photos as long as we asked before snapping someone.  After 10 minutes of snapping the old man we heard youthful giggling coming from just around the corner. Gary led the way and asked the monks (aged around 17 - 20) if we could photograph them upstairs in their accommodation from where they gazed down at us, which was a simple would structure without decoration or paint etc.

At one of the poorer Pagodas on Mekong Island)

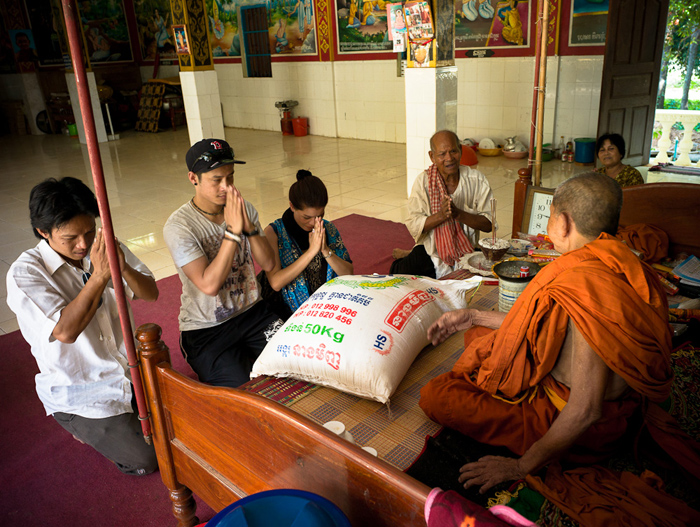
Unfortunately the batteries ran out on the printer so we vowed to return the next day with photos (which we took down the local print shop and printed in large format as they were particularly patient with us, taking so much of their time).  We returned with the photos and an offering of a 50kg bag of rice (which we know helps feed the monks and the people living around the monastery). We received a blessing from the main monk (excuse terminology). Further up the track there were female Monks and some field workers which again provided some great photo opportunities.

(I can't beleive he chose the same colour as me...:-))

Before heading back to Hong Kong I thought I better get a traditional shave and haircut!

(street barbers give you the best shave and haircut for 2 US dollars!)

Then it was time to fly back to smoggy Hong Kong came far too quick and although I cant put my finger on the reason why, I was very sad to leave Cambodia.

I was completely blown away to see such poverty and yet the amazing people therein, always had a smile and warm greeting as long as you were willing to spend the time of day with them.  A note here is DON’T JUST ARRIVE, SNAP AWAY AND DRIVE OFF AGAIN, its not polite and they are humans with their own pride and feelings regardless of their situation. Great people that have suffered much and continue to do so, but they are amongst the friendliest I have ever come across.

I left Gary in Hong Kong to fly back to Riyadh, Saudi Arabia via Singapore which gave me much time to reflect on the previous weeks, Hong Kong and street photography, Phnom Penh and environmental photography along with the people (both photographers and the photographed).

I have to say I have been lucky enough to travel extensively, been on many courses/workshops and had many memorable travel experiences but this was by  far the best experience.  So a big thanks to all but a massive thanks and huge thumbs up to Gary Tyson and F8 Photography.

Roll on the next trip……..Vietnam?? Hmmmm :-)


Final note from F8:

Gary, the Director of F8 has also written a blog post about his experience, that can be seen by clicking here.

Another of the workshop attendees, Rocco, has also written a blog post about his experience, you can read that here.

Also, Gary's assistant RJ wrote a blog post about the same trip, that can be found here.

Thanks for taking the time to visit our blog, if you like our blog and website, please ‘like’ us on our public Facebook page and share this story with your friends with the Facebook and twitter links below.  You can also subscribe to our blog via the RSS link below.

F8 Photography provides commercial photography and training across Asia, with workshops on Street Photography and other photography and video training courses, more details can be found via the ‘courses and workshops’ link and upcoming events via the front page of our website.


EXCLUSIVE: SLR MAGIC 50mm 0.95 on M9/XPro1

(Watch seller - Kowloon - Fuji XPro1, JPEG FINE) UPDATE:  I made some comments about the white balance on the Fuji not being so great later in this post - I retract that statement as I had the camera set to VELVIA mode, so the colours are naturally boosted, making skintones much yellower than the M9...an unfair comparison, so please disregard anything about colours in the post for now, updated images coming soon with ASTIA/PROVIA film settings and RAW once available.

Its arrived!  The SLR Magic 50mm 0.95 'stealth' edition lens...one of only a few in the world available for testing....and we are lucky enough to be one of the chosen few to put it through its paces.  Unfortunately the M mount version of this lens (featured here) is not available to the public yet, so you will have to wait a few more months to get one, the initial pre-order batch for end of July has already sold out.  I think September 2012 is the next batch so get your pre-orders in quick if you are interested!

Another toy that happened to come along with it was the Kipon M adaptor for the Fuji XPro 1, so we have the exclusive opportunity to be able to show some of the first ever images (if not the first) with this combination.

Effectively on the Fuji (1x5 crop), the hyperprime becomes a 75mm 0.95 lens, great for portraits!..

(My friend Kelly helping out with the lens tests - Fuji XPro1, JPEG FINE)

The shots on this blog post were all taken on day 1, have tested the lens here in Hong Kong on a rainy night only for only about 2 hours, the images will all tell you underneath which camera was used and all are shot wide open at 0.95.  The images shot on the Fuji XPro 1 were in Vivid (Velvia) mode in JPEG FINE setting as we are still awaiting RAW conversion update for Lightroom 4, so is difficult to compare with the excellent RAW files coming out of the M9.

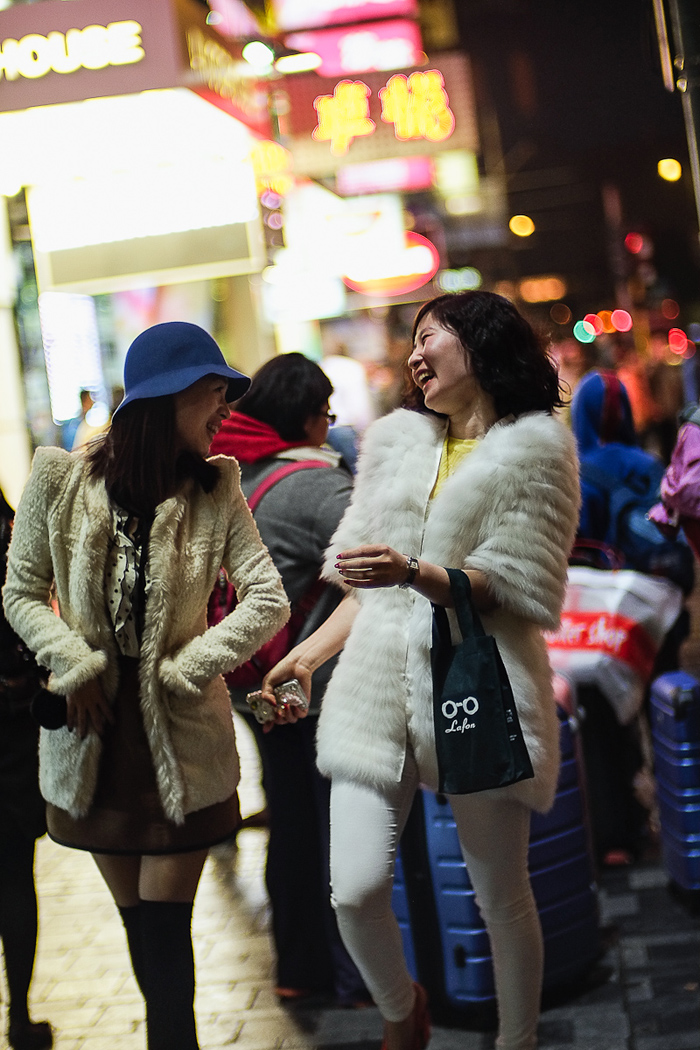
(passer by, Kowloon - Leica M9, processed from RAW)

With the Fuji, there is no focus confirmation, but there is the zoom button which allows very easy focus confirmation at extreme magnification...if anything it zooms too much for my liking.  Personally I found it a lot easier to use just the EVF (i normally hate EVF viewfinders) to focus it and found I could do it quickly and accurately most of the time, even wide open was easier than I thought....this gives a slight advantage over the M9, as with that of course it is always manual rangefinder focus with available light...which is fine during daylight, but much more difficult in low light, the EVF on the Fuji brightened up the scene and made it relatively simple to nail the focus.

(shy laughter, Canton road - Leica M9 processed from RAW)

I noticed Steve Huff did a review yesterday using the lens in bright sunshine with an ND filter, link here, I will be taking his advice and trying something similar myself, although unfortunately the current Hong Kong weather has little requirement for ND filters...its dark by 3pm with this crappy weather! :-(  Maybe in a few days I can get a few images up on the blog with that setup, I have only generally used ND filters either for video work with the 5DII, or with flash to shoot wide open during daylight...perhaps I will try the same with this lens :-)

(shopping, Fuji XPro1 JPEG FINE)

So, heres some more images for now showing both cameras output with the lens.  I must state again as before in all my reviews that I am a 'user' not an analyst, so i don't care much for technical jargon, I just want nice sharp images full of 'pop' coming out the other end of the camera, and both M9 and Fuji are doing that without any hitch whatsoever, I am excited to see the RAW files from the Fuji, as the JPEGs are already amazing....i think in all honesty I am still a slave to Leica though....theres just something magical about what comes out of that camera for me...maybe its the time, effort and money I've invested in the Leica system that hypnotises  me...I have used many many different cameras over the years...but like most M9 users we all agree that when it hits the target...there is nothing quite like it.

(mainland tourists in Nathan Road - Fuji XPro1 JPEG FINE)

(outside Chunking Mansions - Fuji XPro1 JPEG FINE)

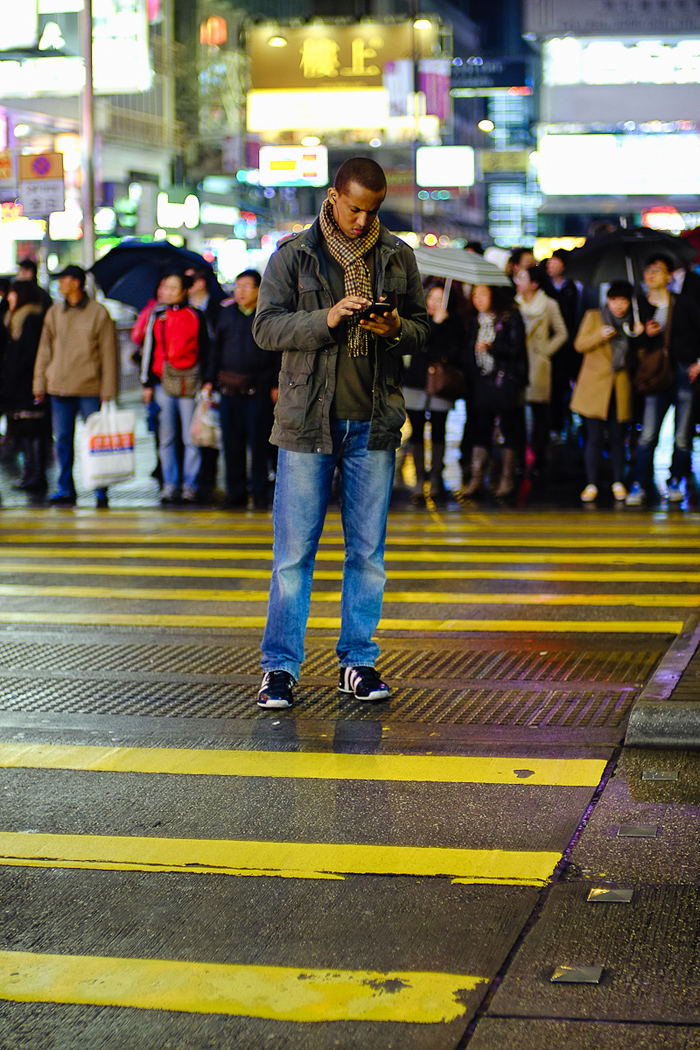
(crossing the road - Leica M9 processed from RAW)

(middle of the road - Fuji XPro1 JPEG FINE)

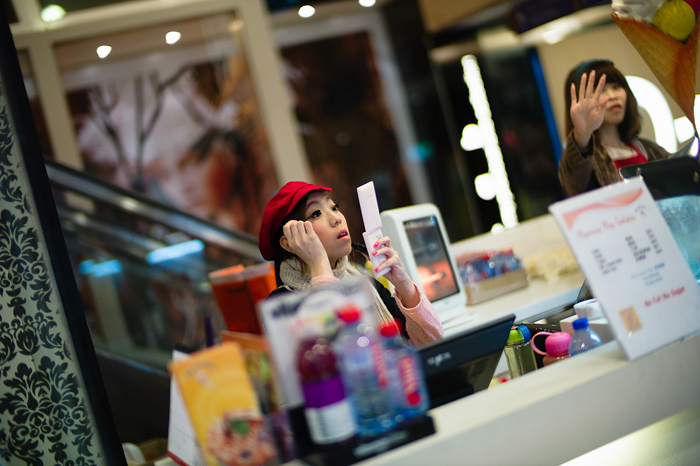
(makeup - Leica M9 processed from RAW)

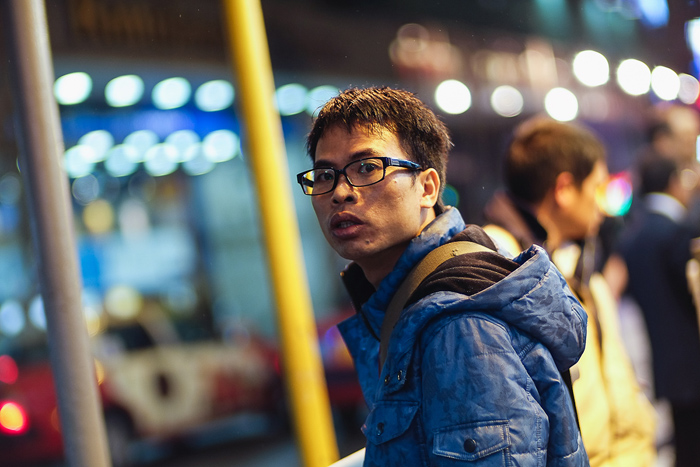
(man in street - Fuji XPro1 JPEG FINE)

(My friend Kelly again, in the subway - Leica M9 processed from RAW)

(lady in the street - Fuji XPro1 JPEG FINE)

(Kelly full length - Leica M9 processed from RAW)

(lady daydreaming - Leica M9 processed from RAW)

My main observation so far between the two has been colours....of course as stated before, its very difficult to compare RAW files with JPEGS.....so I'm not going to dwell on it just yet....more tests to come as soon as I can get RAW access from the Fuji.

You can clearly see from these samples that the colours on the Leica M9 are far better, much more natural and muted and representative of the natural light when out shooting, the Fuji images are excellent, just need the white balance tweaked for each one (I haven't touched white balance on any of these samples).

Anyway, hopefully this will show anyone that is interest in either combination of camera that they are both very very capable of producing excellent results with this lens, and I am very excited to try more shots, especially during daytime also with the ND filter.

Thanks for taking the time to visit our blog, if you like our blog and website, please ‘like’ us on our public Facebook page and share this story with your friends with the Facebook and twitter links below.  You can also subscribe to our blog via the RSS link below.

F8 Photography provides commercial photography and training across Asia, with workshops on Street Photography and other photography and video training courses, more details can be found via the ‘courses and workshops’ link and upcoming events via the front page of our website.


My first thoughts...Fuji XPro1

(35mm lens, ISO 6400, 1/250th F1.4) I have been back in Hong Kong only a day, and I get a phone call from one of my suppliers....the Fuji XPro1 kit is here....come and collect it and take it for a test drive...of course, like the obedient little boy that I am....i quickly agreed and darted across the river to Kowloon to collect it.

Now something has been tickling my mind...last week I had my best week ever with the Leica M9....totally restored my faith in the beast....however I know the Fuji was on the horizon, and although I don't consider it a direct competitor with the Leica, I have to admit I was scared in case the results from it were so good that I started to question my investment in the Leica gear at some point.

Now I must stress again that I am not a technical wizard nor a scientist of any form....I simply use the camera I have in my hand to attain the best images I can....and the only thing that limits me with the Leica is the ISO..thats it, and even then its mainly because i LOVE to shoot in almost darkness or extremely low light and have found the ISO performance questionable in certain situations.  That will soon be rectified as I will be testing the SLR Magic 50mm 0.95 lens from next week, so will be able to shoot bats in a cave without light i think :-)

Anway, I just wanted to post a few images that I shot tonight and share a few quick thoughts on the Fuji XPro1 having used it on the streets of Hong Kong for only 3 hours.

(35mm lens, ISO 3200, 1/800th F1.4)

Camera settings will be posted under each image, however I will not post full size images for one reason....i dont know how to do it and keep the blog size images at same time! I'm an wordpress idiot when it comes to that, so if anyone can share how to do that on my blog I will happily share links to full size files for them should they want to see them.

My initial thoughts were as follows:

Pros:  perfect body size, amazingly sharp lenses with great maximum apertures, looks super cool (one guy i shot even shouted 'waahhhh LEICA!' after I took his pic, so the Fuji has no problem demanding street cred already as people are thinking its a retro Leica :-), extremely good high ISO performance...shooting in the dark at ISO 25600 and nailing sharp images!

Cons:  Autofocus missed a handful of shots initially...i have almost rectified that problem already by turning on some other autofocus settings that seem to help...I think a bit of practice is needed then it will be fine.  After an hours fiddling around, I was able to shoot in a bar with literally no light, where I could not read the label on my beer and get perfectly sharp focus 9 times out of 10...so i guess its just a bit of practice, time will tell, I've heard many complaints about the X100 focus....so i was expecting problems, but nothing dramatic has occured, simple fine tuning and it seems to be pretty much there already.

Here are tonight's quick snapshots, please bear in mind these are purely test shots for me to try and familiarise myself with the camera in low light...testing focus and high ISO performance.

Following shots all on the 35mm 1.4 (equivalent approx to a 50mm on full frame) 

(no post processsing or adjustments, simply camera JPEGS here)


(Rocco the Leica slave,  1/350th F1.4, ISO 6400)

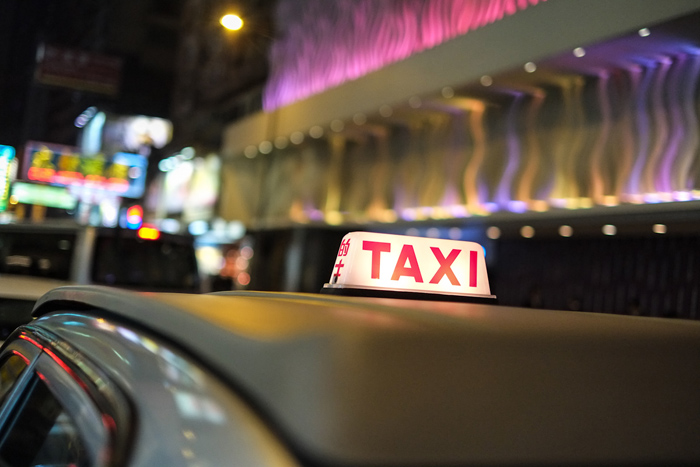
(Taxi,  1/1000th F1.4, ISO 3200)

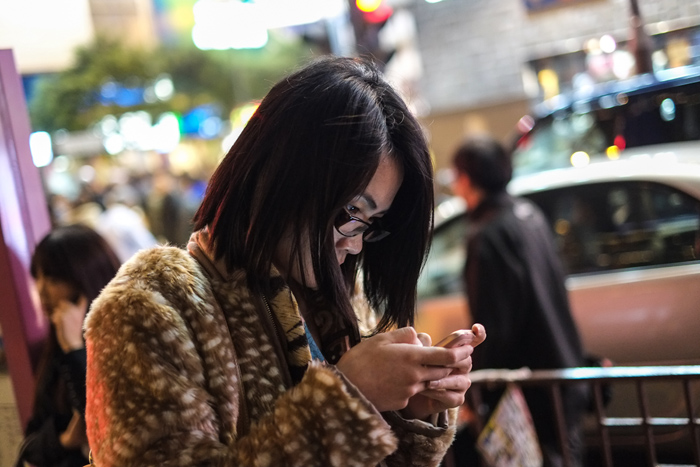
(Woman texting,  1/150th F1.4, ISO 3200)

(Happy Couple,  1/350th F1.4, ISO 3200)

(Caught me peeking,  1/105th F1.6, ISO 3200)


The following few pictures were all taken on the 60mm 2.4 lens (again, no post processsing or adjustments, simply camera JPEGS here)

(dinner time,  1/110th F2.4, ISO 5000)

(inside computer centre,  1/500th F2.4, ISO 5000)

The following images were shot in a very very dark bar, i cranked up the ISO straight to the maximum ISO 25600.....heres the results...again, no noise reduction, or post production whatsoever, these are straight from camera.

(35mm lens, ISO 25600, 1/450th, F1.4)(35mm lens, ISO 25600, 1/340th, F1.4)(60mm lens ISO 25600, 1/120th, F2.4)(60mm lens, ISO 25600, 1/170th, F2.4)

Although these images have been shrunk down for blog sizing, hopefully there is enough information to show the quality at least to give an idea...basically as I said already, there is a total lack of noise anywhere at any ISO....I shoot normally Canon 5D Mk II, Canon 7D or Leica M9 and this Fuji blows them all out of the water in a nano-second with regards high ISO performance...if this is the future of cameras to come with this kind of high ISO performance, then I might as well sell my flash units, as I won't be using them much anymore!

I have to say, apart from the tiny niggles with the autofocus I had at the start of the night, overall I am extremely impressed....I ain't selling my Leica gear, its a very different feeling for me shooting a rangefinder over an autofocus camera...but for sure this new Fuji is going to be getting a serious workout over the coming weeks.

My initial advice to anyone who is looking for a lightweight alternative to DSLR where image quality is paramount, or a less expensive alternative to Leica for street or travel photography...I think this camera could very easily fill that gap.

Please bear in mind that I have not tested any other cameras that could be considered competiton....this is just my gut feeling as a photographer who shoots a lot of images on a day to day basis in a variety of situations.

Thanks for taking the time to visit our blog, if you like our blog and website, please ‘like’ us on our public Facebook page and share this story with your friends with the Facebook and twitter links below.  You can also subscribe to our blog via the RSS link below.

F8 Photography provides commercial photography and training across Asia, with workshops on Street Photography and other photography and video training courses, more details can be found via the ‘courses and workshops’ link and upcoming events via the front page of our website.


Guest Post: RJ's Cambodia (F8 Assistant)

Note:  This post is written and all photos by RJ Gurung, assistant photographer/trainee with F8.  He has been training with F8 Photography for approximately 6 months, with little previous knowledge in photography before he started in September 2011.  His enthusiasm and passion for photography drives him and has helped him develop a unique and interesting style.  I felt a trip to Cambodia would help him explore his creativity and push his skills further. - Gary Tyson, Director F8 Photography. (The author and photographer - RJ)(RJ with the street kids)

On the 2nd of March 2012, a small group of us took a direct flight to Cambodia from Hong Kong. Upon arrival in Phnom Penh in the early evening, the light was already gone, therefore we took the time to sample some Khmer food and crashed at our hotel.

Pumped up with the excitement to capture some great shots, the next morning we headed over to the poor areas of the city. Our Tuk Tuk driver advised us to visit these areas as we had told him the type of images we wanted to get, and we felt it portrayed the unfortunate living conditions of many Cambodian people.

(street kids in the railway yard)

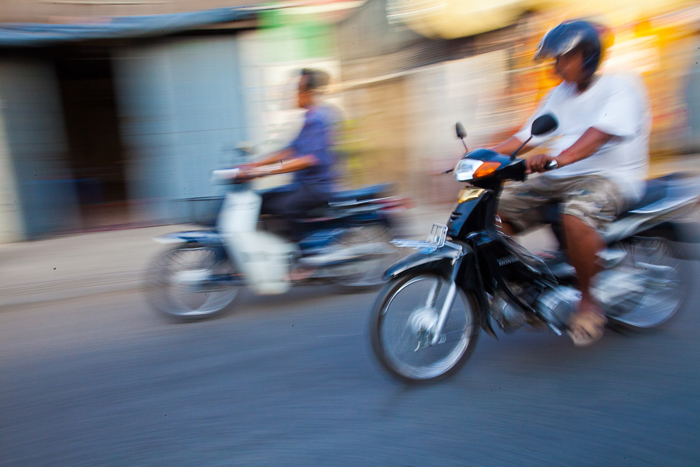
Poverty is a big issue in Cambodia, another issue was the traffic which was very chaotic on our travels around the city.  On the roads we could see motorbikes everywhere,  even young children that looked as young as 7 or 8 years old were riding them on busy streets, so I decided to practice some techniques and capture panning shots of the motos and I was happy with the results!

(panning shotwhilst travelling by Tuk Tuk) 

Whilst we were visiting the poor areas of town, we witnessed a lot of interesting characters. There were kids playing around, old folks gathered together for their everyday chats and a humble group of people living their life in a very different way that I am familiar with in Hong Kong. We went further inside the slums and started to take pictures when the kids came over and greeted us with smiles on their faces. I must say I had an incredible time taking pictures of the kids at the same time being mesmerized by their innocence and reminiscing my own childhood.

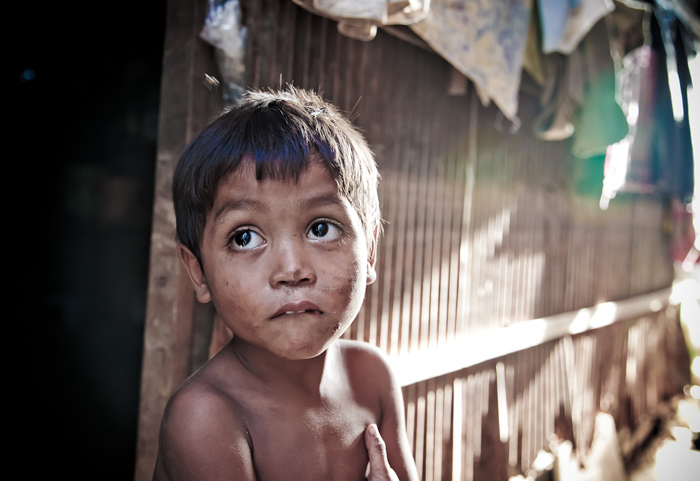
(the eyes are the window to the soul)

One of the shots of this small kid came out to be pretty strong. I feel like the innocence and shyness of this kid twinkles in his big eyes contrasting with his dirty face reflecting his playfulness. The experience in the slums was very inspiring and it didn't seem  right to just walk away from there after taking the picture so I printed out some of their pictures and gave them a couple of dollars as a sign of respect. Overall, it was a remarkable experience for me to see how humble and lively the people in the slums were despite struggling and living their life in poverty.

(giving a print made a big difference)(RJ likes to shoot wide and close with the street kids)

The next day we went to explore Mekong Island, a short boat trip across the Mekong river.  The island has many old pagodas where the monks live, hence being calm and peaceful in contrast to the city.

(RJ shooting on Mekong Island)

In Cambodia, Buddhism is the main religion, so it was no surprise to see many young monks in the pagodas. We took their pictures and gave quite a lot of prints to them. Unfortunately, our printer ran out of batteries at the end of the day so we decided to go back the next day to give them the remaining prints and they seemed really happy to see us again.

(Young monks on Mekong Island)

We also managed to get the blessings from the monks who prayed for us. As a token of appreciation, we gave them a 50 KG bag of rice.

(Offering rice for the monks at the Pagoda)

The island offered some breathtaking scenery.  Myself and Gary climbed onto the roof of the boat when we were travelling to the island so we could soak up more scenery and sun!

(Gary and myself crossing the river on the roof of the boat)

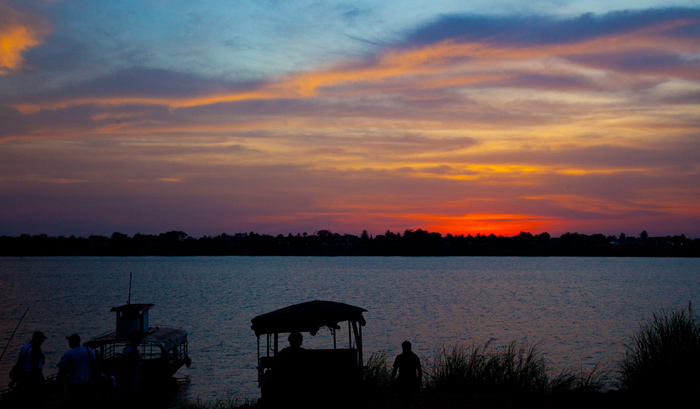
On the return journey back to the city we were lucky enough to see a stunning sunset which gave me a really good feeling and was the perfect end to the day and the trip before we headed back to Hong Kong the following day.

(Gary & I on the boat during sunset)(Sunset over Phnom Penh)

Gary, the Director of F8 has also written a blog post about his experience, that can be seen by clicking here.

Thanks for taking the time to visit our blog, if you like our blog and website, please ‘like’ us on our public Facebook page and share this story with your friends with the Facebook and twitter links below.  You can also subscribe to our blog via the RSS link below.

F8 Photography provides commercial photography and training across Asia, with workshops on Street Photography and other photography and video training courses, more details can be found via the ‘courses and workshops’ link and upcoming events via the front page of our website.

Cambodia - Me & my Leica M9

Note: This is not a technical review of the Leica M9 in any way shape or form, its purely my own view of the experience of using one in the field with the images I shot to support my views, I also comment here about some AMAZING Zeiss lenses that I have been using that should definately be considered if looking for alternative glass for Leica cameras. (Children live along the disused railway line in Phnom Penh, one of the poorest parts of the city - this shot taken with the Zeiss 25mm 2.8 lens, which surpassed my expectations, delivering amazing sharpness and 3D look every time)

So its been 6 months since I travelled to Cambodia and almost as long that I've owned and used a Leica M9 for my street photography in Hong Kong.  On my previous travels I have always taken too much gear, 5D Mk IIs, lights, video kit....the list goes on...

One of the reasons I acquired a Leica M9 was to enable me to travel light and still maintain a full frame camera with high quality as well I guess as taking a step back into retro-land and simplifying the process by using a rangefinder with minimal external functions, other than aperture and shutter...

The purpose of this particular trip was a mini-workshop, teaching a few previous students some 'environmental portraiture' in a photographically rich environement, which was to be the city of Phnom Penh in Cambodia and its surrounding villages and islands in the Mekong river (blog post on their work to follow).

As I was teaching as well as shooting my own work, the Leica gear was a perfect compromise as it enabled me to move around quickly with just one small bag (the thinktank retrospective 5) with all my gear inside instead of the usual large heavy backpacks that I carry full of DSLR kits.

My packing list for this trip was:

Leica M9. Leica lenses: 35 f2, 40 f2, 50 1.4, 90 f2. Zeiss lenses: 21 2.8, 25 2.8 (quite possibly my new favourite lens). external viewfinder for the 21/25 lenses. 2 x batteries. Macbook Pro and external firewire 800 'Lacie rugged' hard drive

(I always use external firewire or thunderbolt drives to store and manage my Lightroom catalogues - it runs just as fast if not faster from an external drive (as long as not USB, and worse case scenario if my laptop were to be stolen I would still have my external drive with all my images (that stays in the hotel safe when I'm not there).

Enough of the technical jargon....below you will find images from the trip that I shot (we were there 4 full days).  All I can say at this point is the M9 far exceeded my expectations, delivering everything and more than my Canon can deliver, and to be honest I think the star bit of kit on this trip was the Zeiss 25mm 2.8 lens....it nailed every shot with some of the best 3D rendering I have been able to produce.

(More kids living in shacks along the disused railway line)(old lady, shot with the Zeiss 25mm lens...amazingly sharp)

One of the most prevalent features of Cambodia for me are the children, there seems to be just masses of kids everywhere, a lot of them living in extreme poverty yet in general they seem quite content, I guess they don't know anything else, so they just cope with what little they have.  Whilst in this run-down part of town, I noticed one child that stuck out more than others, because he was pure white....you can see him in the photograph below right.  I spoke to his mother and father through our translator (both parents were very dark - his mother can be seen in the image looking down on him).  I was slightly confused as to his origins, however they assured us that his dark skinned father was indeed his natural parent, and that the mother had watched some western TV shows and prayed for her child to look that way, and lo and behold - he was born white with light almost ginger coloured hair!

(Children of the railway village, including the 'western' looking child we found pictured here on the right)

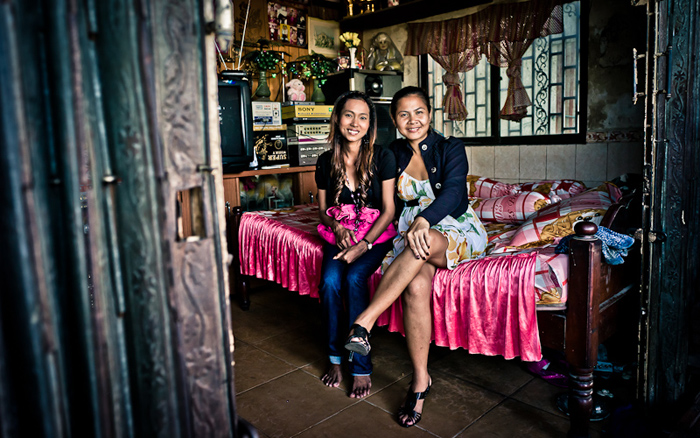
We also found some local older girls who spoke perfect english and were happy to admit they worked as 'bar girls' in the red light area of the Phnom Penh, they were also happy to be photographed.  It is an unfortunate fact that in this city for young women living in these areas, this lifestyle is probably by far the most lucrative for them - an unfortunate situation that is probably emulated in many other cities around Asia and the rest of the world.

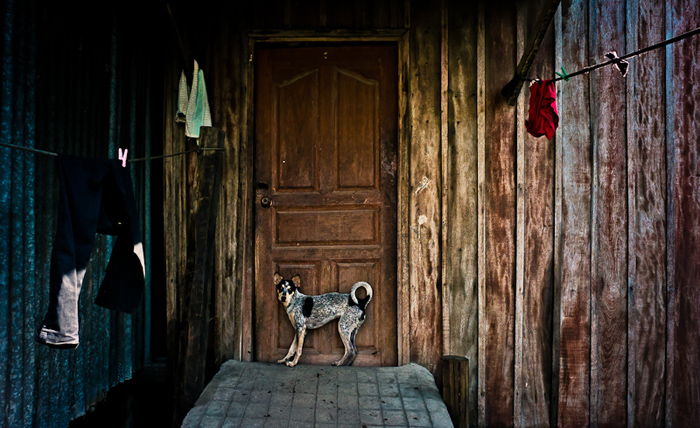
(working girls that live in the railroad slums)(in the doghouse...)

Although this part of town is extremely poor, it is photographically rich, every doorway and person I saw was a potential photograph, one of our workshop participants felt a little uncomfortable to shoot in this neighbourhood, feeling it was slightly voyeuristic and intrusive.  I can totally see his point and why he felt that way, but I personally have shot in many areas like this all around Asia, and my general feeling is that if you approach your subjects the right way, talking to them first, asking permission, and I also take a small Canon CP800 printer with me and supply them with prints right there and then (the battery on this thing lasts almost a week whilst churning out 40-50 prints a day!!!), then generally its a very positive experience for everyone, probably a novelty for them for some western people to visit, show an interest, give them gifts and exchange lots of smiles along the way.

(giving back a print and some candy to the kids was certainly the best way to gain access for us)

Of course a visit to Cambodia wouldn't be complete without involving some monks or temples...we didn't want to travel to the famous temples in the North around Siem Reap, instead we opted to find some working monks in pagodas around and outside the city on the outlying islands in the Mekong river, so our next day was spent in the heart of mosquito land around the rivers.  We found plenty of friendly working monks who were more than happy to be photographed, we took them a 20kg bag of rice as a gift and that opened up all the doors we needed to get some nice environmental portraits, as well as them enjoying practicing their english language skills with us.  In my experience this has been always the kind of reception I get, other people I have spoken to tell me Monks usually don't like being photographed...I personally have no experience to support that theory.

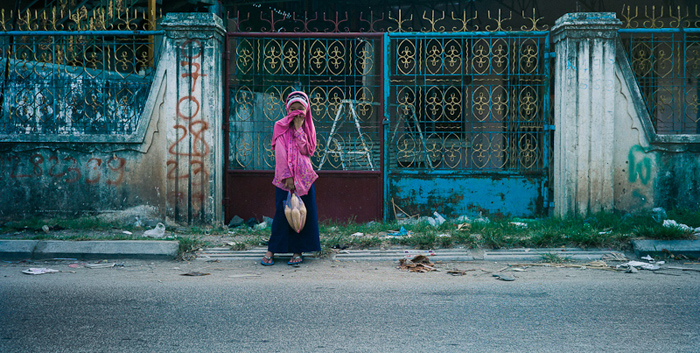
We also found a muslim area in Phnom Penh, something I had noticed on previous visits, unfortunately people were very reserved and not willing at all to be photographed, everyone I approached either ran away or waved me away, so I respected their wishes and left them alone, I only managed to grab one shot in that part of town which was a young girl who I guess was out shopping for her family, she giggled and covered her face when I spotted her, but didn't seem to mind being photographed so I took the chance and grabbed the shot from across the street.

(young muslim girl in Phom Penh)

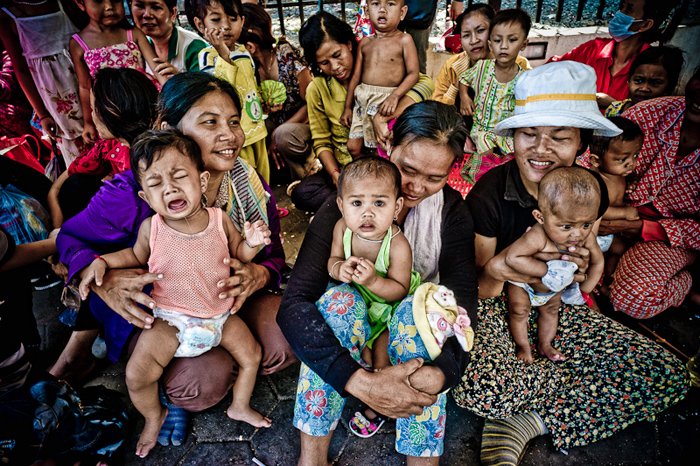
On our last day we were finishing up and driving back to get our gear to head to the airport when we noticed a massive gathering of women and children at the roadside.  Our Tuk Tuk driver informed us that this area had a free childrens hospital so everyone was waiting for that...I couldn't resist jumping off and grabbing a few shots from across the street to create a panoramic look then getting up close with the Zeiss 21mm lens as they all seemed happy enough for me to be there...

(the Zeiss 21mm 2.8 performed amazingly on the M9)

So that was it, 5 days travelling around Phnom Penh and the surrounding villages, only the Leica with me this time, and I hope the images above can speak for themselves...with a few different focal lengths this kit was much more efficient for me than my bulky gear I normally take...I will be testing the Fuji XPro1 shortly which may indeed give the Leica a run for its money, especially given the incredible price difference and the amazing high ISO performance of the Fuji...(I tried one last night back in Hong Kong so I have seen the results already)...So until next time, I hope you enjoy the images from our travels and they can inspire you to get out and shoot...and if you haven't been to Cambodia already....you are really missing a gem of a place to visit...not to mention Angkor beer is amongst the finest ale I have ever sampled :-)

My assistant photographer RJ has also written a blog post about his experience, that can be seen by clicking here

Thanks for taking the time to visit our blog, if you like our blog and website, please ‘like’ us on our public Facebook page and share this story with your friends with the Facebook and twitter links below.  You can also subscribe to our blog via the RSS link below.

F8 Photography provides commercial photography and training across Asia, with workshops on Street Photography and other photography and video training courses, more details can be found via the ‘courses and workshops’ link and upcoming events via the front page of our website.

SLR MAGIC 50mm 0.95 Hyperprime (FIRST LOOK)

(First shots wide open  in Lan Kwai Fong) Anyone that shoots Leica M cameras may have heard the buzz that is going around currently about this new 50mm lens that is due to come out later in 2012.

We were lucky enough to meet Andrew Chan from SLR MAGIC who let us have a play with a prototype lens here in Hong Kong for a few hours.

Something I must state up front is that firstly I am in no way affiliated with SLR MAGIC or Leica, so my opinion is completely unbiased.

Secondly, I have never even touched a Leica Noctilux lens, which of course is the only other lens in this category (unless you consider the Voigtlander 50 1.1), and to which people are comparing this lens, therefore I cannot compare quality, bokeh or any other details.

I am only qualifed to tell you what I think as a working professional and extremely passionate street photographer my views on what I thought about the lens after an hour or so of playing with it.

Please note that none of the pictures here have had any sharpening applied to them, only minor colour and tone adjustments.

We met Andrew in Lan Kwai Fong in Central, a great place to shoot in low light as there is plenty of street lighting, alleyways and of diverse characters to shoot.  Also that night it was raining which added a certain ambience to the light.

I was running a street photography workshop with Eric Kim from LA this last weekend so he joined us and posed as my subject for a few of my first test shots, which have now landed as his profile pic on his website and facebook page:-)

We will be running many more of these street photography and travel workshops regularly by the way for anyone interested, check our website here (apologies for the quick plug to my own business..:-))

(Eric Kim posing for the hyperprime...focussing was perfectly accurate at 0.7 metres)

I do own a Leica 50mm 1.4 pre-asph lens which is extremely sharp and I am very much in love with this lens, so I wanted to compare the two, not really for sharpness but more to see how big the difference in BOKEH (background blur) was between 1.4 and 0.95 and if I thought the difference was substantial enough for me to consider buying the hyperprime when it is available.

So my first thoughts in brief for this first look are as follows:

1.  Its damn heavy (as expected), its a very big piece of glass, so this is no surprise...I don't mind this fact, heavy glass means quality as far as I'm concerned.

2. The build quality feels great, very very solid...I love the smooth 'no click' aperture ring...very very cool, and lovely built in sliding hood and screw on lens cap.

3. Its gonna be expensive...nowhere near as expensive as a Noctilux of course, but its gonna be a lot more expensive than the Voigtlander 50mm 1.1 (I have used that lens, and unfortunately I'm not a big fan of that particular lens although for the price it is still very acceptable for many people).

4.  The BOKEH is AMAZING!!  Yes, I compared it to all I had available...which is a 1.4 and of course there is a big difference between the two.

5.  Its damn SHARP wide open....I took about 100 shots with it, all wide open...and found about 90% of the shots were pin sharp where I focussed, I am sure any mis-focussed shots were only down to me, not the lens.

(Eric Kim  in Lan Kwai Fong)

Please bear in mind that I am not a technical guy...to be honest, none of my Leica lenses are coded, I don't notice any problems or differences between other lenses that are coded that I have used, maybe I'm lucky, or just ignorant...I don't look that hard, I just want to make strong images, and I'm more concerned with my subject matter.  I don't get too excited about whether a lens has a very slight vignette effect, MTF charts or slight barrel distortion...I'm a photographer...not a scientist :-)...Most imperfections in my opinion (especially vignette or barrel distortion can be fixed in Lightroom 3 in about 2 seconds, and even quicker if u set up a lens profile preset that if you had any issues, so could easily be fixed on import without ever having to do anything).

Just to note on my previous paragraph, I didn't see any vignette or distortion with this lens, but i didn't test it for these factors either, as I said I tested it as a photographer who shoots low light portraits and street photography.

To summarise, are these very few points that I have addressed enough to make me want to buy one?....the short answer is YES...I want one NOW.

I will be contacting Andrew at SLR Magic to get my name on the list...I will buy one as soon as they are available...not because I'm a gearhead (that's debatable among my friends :-)) but purely because I LOVE to shoot in very low light...I love BOKEH....and I love to save a bit of money where I can...there's no way I can afford a Noctilux...the Voigtlander 50mm 1.1 is not in the same league in my personal opinion.....so this is where SLR MAGIC is going to fill the gap with regards price...but with quality I suspect they may well overtake the Noctilux....I really can't fault this invention and I hope the production copies are as accurately calibrated as the prototype I played with.

The camera world is very exciting at the moment, and I'm very positive about this lens and am sure its going to be a great success.

Here are a few other images shot with the lens, all wide open on the M9.

(Me, photographed by Eric Kim at minimum focussing distance)

(shot wide open from a bit further back..)

(wide open, shooting through my friends with background about 10 metres away.)

(black and white conversion)

Thanks for taking the time to visit our blog, if you like our blog and website, please ‘like’ us on our public Facebook page and share this story with your friends with the Facebook and twitter links below.  You can also subscribe to our blog via the RSS link below.

F8 Photography provides commercial photography and training across Asia, with workshops on Street Photography and other photography and video training courses, more details can be found via the ‘courses and workshops’ link and upcoming events via the front page of our website.

BTS with Metro Vocal Group (VIDEO)


In October we were approached by Metro Vocal Group to shoot promotional images for them and help produce their new album design.

They really liked some of our previous ‘grungy’ HDR portraits that we had done and were very keen to emulate this style, so we went ahead with this concept to help promote their new ‘more funky’ image for the group.

The ideas consisted of shooting several portraits of each member of the group using 3 point lighting.  The purpose of this is so that light is coming from all different directions, this helps when making composite images.

Because of the setup required for this, we were able to do the shoot in the comfort of Metro’s own studio, so minimal disruption to them, and luckily our offices are only a few minutes apart in Central.

Once we had the portraits shot with the 3 point lighting, we did a few outdoor shots in the street below their studio so we had some variety of images.

Then we just needed to shoot several HDR backdrops from around town to use as backdrops for the composite images and put it all together in photoshop.

Below is a video showing a quick edit of the day of the shoot and a few of the images also.

We had great fun, great bunch of guys and look forward to seeing the finished CD designs in early 2012 and hearing the new album!

http://vimeo.com/34062983

For more information on Metro Vocal Group, check out their website here

Thanks for taking the time to visit our blog, if you like our blog and website, please ‘like’ us on our public Facebook page and share this story with your friends with the Facebook and twitter links below.  You can also subscribe to our blog via the RSS link below.

F8 Photography provides commercial photography and training across Asia, with workshops on Street Photography and other photography and video training courses, more details can be found via the ‘courses and workshops’ link and upcoming events via the front page of our website.
Vibram HK100 Ultra-Marathon Event

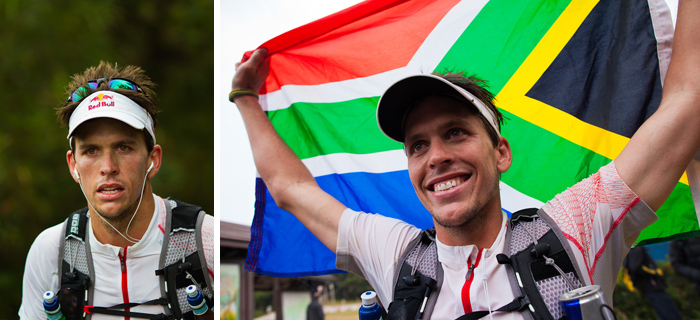
It was 4am on Saturday morning....the alarm clock was ringing loud....it was time to get up, travel north to the mountain areas of Northern Hong Kong and get ready for a very very long day of shooting the HK100 ultra-marathon event.  27 hours later at 7am the Sunday morning, we finally stopped shooting and packed up our cameras, having shot over 2000 images, and headed home for what we thought was a well earned sleep!  Of course our task was nowhere near as difficult as the participants, who had to run, walk and crawl 100km across some of Hong Kong's infamous peaks and trails, with a total elevation change that equates to twice the height of Everest! (Ryan Sandes - Winner HK100 2012 in a new record time of 9hrs 55 mins!!)

Our job was to record the action, the drama, the emotion and the glory of the event, and we hope we have done so to the best of our ability.  We would like to share a few of our pictures here so you can see the diversity of the participants, their pain, their pleasure and really just an overall amazing experience for everyone who took part.  We started off as expected at the start line, capturing the pre-race nerves and party-like mood of most of the participants, which was great to see, given the fact the next 24 hours of their lives was going to be painful!

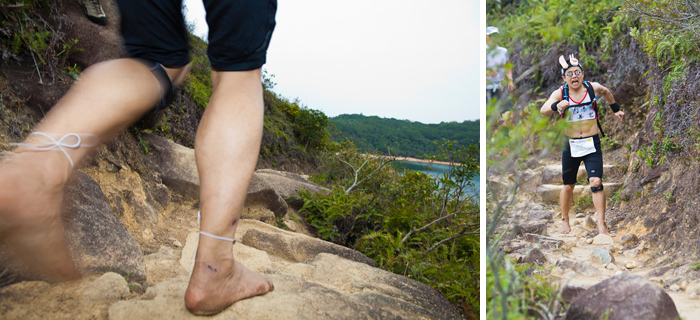
(this guy on the right about to run 100km across rocks with no shoes on?!? Must be crazy!)

We were astonished to find one runner who was doing the event with NO shoes....and even more amazing was the fact that he was among the front runners as we travelled around the course! Here's some images of him in action at the 36km mark...as you can see from his facial expressions, I'm sure he would rather have some nice running shoes on...haha....we have to applaud his courage...or is it insanity?!

(slow sync flash with the Canon 5DII and 24mm mark II prime lens)

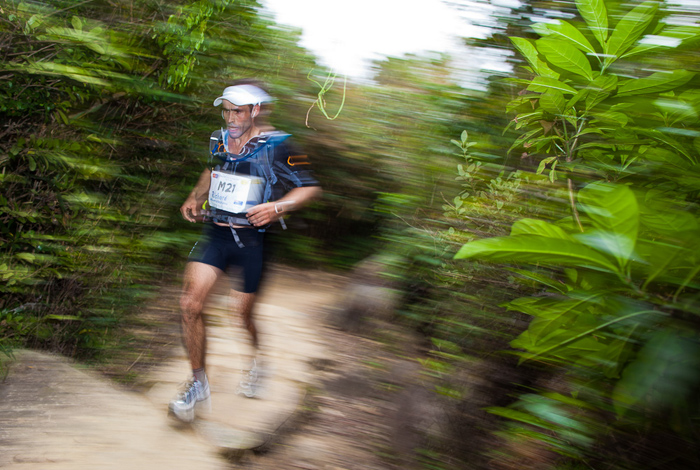
We used a combination of Canon 5DII's with wide prime lenses and slow sync flash to capture close up action as well as a couple of 7D's and long lenses which were perfect for sports with their fast drive and autofocus.

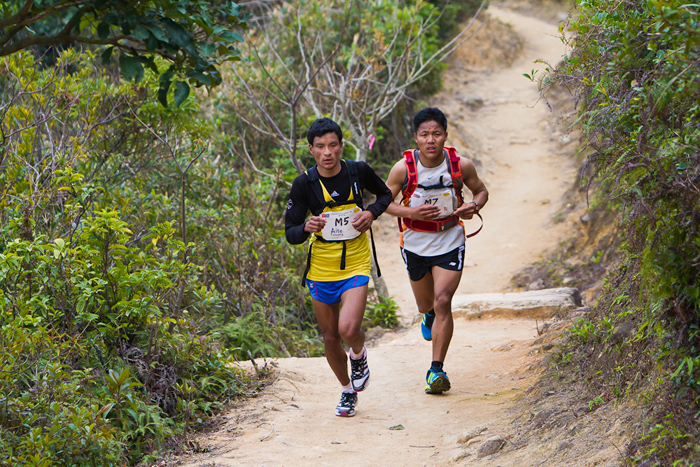
(the two Nepalese runners who led the way for much of the race, eventually coming 2nd & 3rd)

The course was extremely well marked and manned by the hundreds of volunteers, with checkpoints being very welcome breaks for the athletes, and a good opportunity for refreshments, fixing feet and catching up with loved ones.

(smiles all the way to the finish line)

Every part of the course we covered, people were ecstatic, smiling, screaming and thoroughly enjoying the experience...to be fair, at the finish line most people were much quieter by that stage having spent a very long day and night on the hills.

(high ISO in the middle of the night - no problem for the 5D mark 2)

The Canon 5DII again came into its own during the night, with its great high ISO performance, allowing us to capture some nice moody black and white images lit usually only by headtorches and the occasional lamp.

(5D mark II with fisheye lens and slow sync)

After 25 hours of photography, I thought it was time to break out the fisheye lens and try to get some shots with that, so it was a case of lying down on the floor underneath the small flags at the finish line, trying some rear sync flash and getting extremely close to the runners as they came across the line, this gave a dramatic effect which I like...similar to a lot of my styles of photography, i really believe the old saying "if its not good enough, your not close enough....".

(James the videographer from Mededs with Gary, RJ taking a break and in action during the night)

In the end, we packed up our kit at first light on Sunday, and headed home, a great experience for us, made me reminisce of my army days being stuck out on a mountain all night, but its all part of the fun, great event, great people, and we hope we have done it justice with our images.  We look forward to next year, where we will ensure Starbucks has a takeaway truck parked up the top of Tai Mo Shan for us :-)

Thanks for taking the time to visit our blog, if you like our blog and website, please ‘like’ us on our public Facebook page and share this story with your friends with the Facebook and twitter links below.  You can also subscribe to our blog via the RSS link below.

F8 Photography provides commercial photography and training across Asia, with workshops on Street Photography and other photography and video training courses, more details can be found via the ‘courses and workshops’ link and upcoming events via the front page of our website.
Team Vibram photoshoot

This year we were asked to cover the Vibram HK100 ultra-marathon, which took place this weekend (blog post on that coming soon). A few weeks ago we met up with the Vibram tester team to do some marketing and advertising shots for Vibram China which were used for press release and upcoming Vibram trade shows in Beijing and all over the world.

We spent the day on the mountains above Hong Kong, with great moody skies which helped with our black and white photography, a few lights and some very fit Team Vibram members posing for us running up and down the hills and along the mountain sides.

All in all a great day out for us, yet another reason to love being a photographer - getting out into the fresh air with great scenery, meeting fantastic people and delivering some work that they are very happy with,   Its great when everything falls into place like it should.

The next blog post will show images from the HK100 event itself, both behind the scenes and the race - we are just recovering (as are the athletes I'm sure), as the race was a long long weekend, almost 25 hours non-stop photography....a mission in itself!  That will be coming very soon in the next few days, please check back to see that shortly.

In the meantime, here's a few images below from the test shoot with them:

Thanks for taking the time to visit our blog, if you like our blog and website, please ‘like’ us on our public Facebook page and share this story with your friends with the Facebook and twitter links below.  You can also subscribe to our blog via the RSS link below.

F8 Photography provides commercial photography and training across Asia, with workshops on Street Photography and other photography and video training courses, more details can be found via the ‘courses and workshops’ link and upcoming events via the front page of our website.
 

Using a Steadicam (VIDEO)

Many of us have been shooting more and more video with our DSLR cameras over recent months and years, which is great, as we get to use the shallow depth lenses for really nice cinematic effects. However, one of the problems we encounter, due to the size and shape of the cameras is excessive movement.  This can be countered by using a monopod or tripod, but sometimes you want moving shots, people walking, running, etc, and this is where the steadicam comes into play.

We have a couple of different steadicam rigs, some of them can get quite expensive, however one we have found particularly useful is the Wondlan Steadicam rig that can be purchased in Hong Kong at a relatively low price compared to other steadicam rigs - but with very similar and sometimes even better results!

We have put together a short video that shows some footage shot with the Wondland Steadicam rig, and compare footage to handheld, as well as showing how we set up the rig very quickly to be able to achieve these results, the video below is 6 minutes long, and Gary did almost fall off a cliff making this film as you will see at 1 minutes 42 seconds!

http://vimeo.com/f8photography/wondlansteadicam

We hope this video is useful for anyone considering getting or using a steadicam, it really does add a lot of production value to any video footage in our opinion, and gives you options that are simply impossible without a steadicam.

When using a steadicam, the way we think about it is we compare it to trying to walk (or run) with a cup full to the brim of hot coffee...its kind of a similar technique to how you would walk, certainly you cannot walk or run naturally, so you will attract a bit of attention whilst using one, maybe even a few laughs, but the footage stability speaks for itself.

Just be careful you look where you are going when using one, its easy to trip or fall over as we demonstrated :-)

Thanks for taking the time to visit our blog, if you like our blog and website, please ‘like’ us on our public Facebook page and share this story with your friends with the Facebook and twitter links below.  You can also subscribe to our blog via the RSS link below.

F8 Photography provides commercial photography and training across Asia, with workshops on Street Photography and other photography and video training courses, more details can be found via the ‘courses and workshops’ link and upcoming events via the front page of our website.


No Photos allowed.....or are they? (VIDEO)

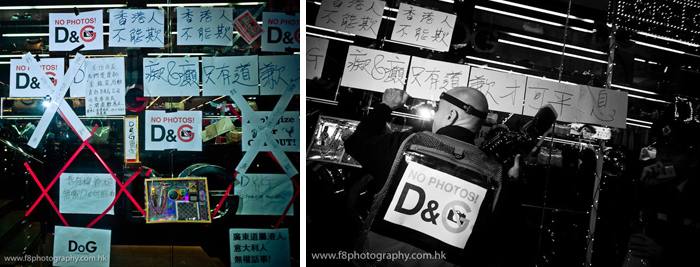
Cat Street market stall advertising 'NO PHOTOS'

In recent news here in Hong Kong there has been much controversy about photographers rights to shoot in public places (in particular in front of large branded designer stores, etc).  Security guards have been misinformed by their employers about what is 'public space' in front of a shop and therefore this has led to confusion, aggressive and sometimes even violent confrontations between photographers and staff.

These big stores are not the only places that try to 'enforce' a ban on photographers, even small market stalls have signs up saying 'no photos', 'no cameras', or 'photo - $200', etc.

To those of us in the know, this is basically outrageous behaviour on behalf of the shopkeeper, trying to create some kind of martial law around their own property, thinking they can control what you do with your camera in a public space.

Now, I don't want to confuse the issue of photographing people, I am well aware as should everyone be that some individuals do not like having their photograph taken, especially without permission, and I  completely understand the issues surrounding that.  This is not what this blog post is about, it is purely about having the right to shoot an interesting market stall, a shop facade or interesting building without having to worry about consequences or thinking that you are doing something wrong - you are not, its well within your rights to take photographs.

This short video we shot in an hour or so the other day shows a quick walkaround Central and Sheung Wan in Hong Kong shooting a few market areas where they have these signs.  I have heard many people say they get confronted in these places so thought I would try to see for myself if we had similar problems and I highlight in the video the ways in which we shoot to try to avoid confrontation.

This is the first DSLR video that Gurung RJ has shot with very little instruction in advance, so I must thank him for his efforts in helping me put this together.

Also a special thanks to Will Gell who has very kindly allowed me to use his music for various projects, amazing musician, check out his albums here:

Please remember when out shooting that you WILL upset some people sometimes, that's unfortunately the nature of the beast with street photography, some people will always react negatively no matter how polite you are, maybe they just had a bad day, or maybe they just grumpy...thats life, its a choice you make if you wish to become a street photographer, never take it personally, and try not to respond in the same manner, keep smiling, say thank you and continue on your way.

Previous recent blog posts that relate to the same issues are linked below, the first one has an extensive video shooting street photography in Kowloon with a GOPRO camera attached to the top of the Leica M9, linked together with the images that we captured during the walkabout:

HOW WE SHOOT STREET PHOTOGRAPHY IN HONG KONG (VIDEO)

DOLCE & GABBANA PROTEST FOR PHOTOGRAPHERS RIGHTS IN HONG KONG

Thanks for taking the time to visit our blog, if you like our blog and website, please ‘like’ us on our public Facebook page and share this story with your friends with the Facebook and twitter links below.  You can also subscribe to our blog via the RSS link below.

F8 Photography provides commercial photography and training across Asia, with workshops on Street Photography and other photography and video training courses, more details can be found via the ‘courses and workshops’ link and upcoming events via the front page of our website.

Photographers rights protest at D&G

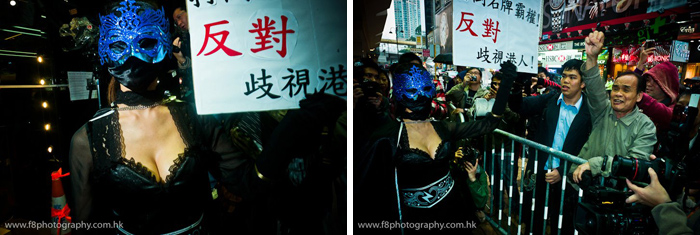
Recently in the press there has been a fair bit of exposure about an incident here in Hong Kong involving a security guard (who looked more like a burly bodyguard) at the Dolce & Gabbana store in Tsim Sha Tsui stopping people with cameras from shooting the facade of the building from the public pathway. Allegedly they were refusing local Hong Kong photographers from taking pictures, but allowing mainland chinese customers to do so, as long as they were coming into the shop and buying goods.  This kind of racism and discrimination is clearly unacceptable behaviour for anyone to have to endure and we are very happy that the public has reacted in the way it has over this incident.

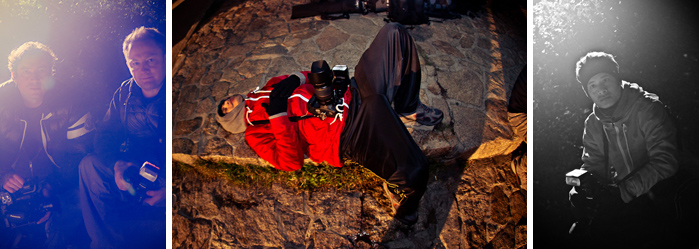
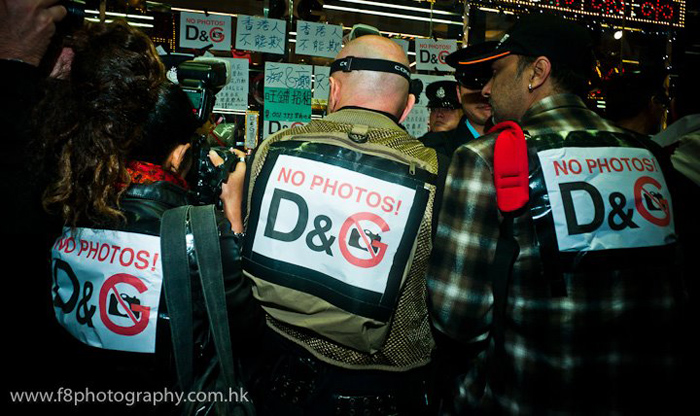
A few of us expat photographers decided to gather during one of the Sunday afternoon protests and head down there armed to the teeth with cameras and HD video headcams to film the protest, take lots of photographs and generally assist the protesters in sending their message, wearing Grahams custom made 'No Photo' signs on our backs to add some impact to our message.

getting ready for battle...Our uniforms for the day

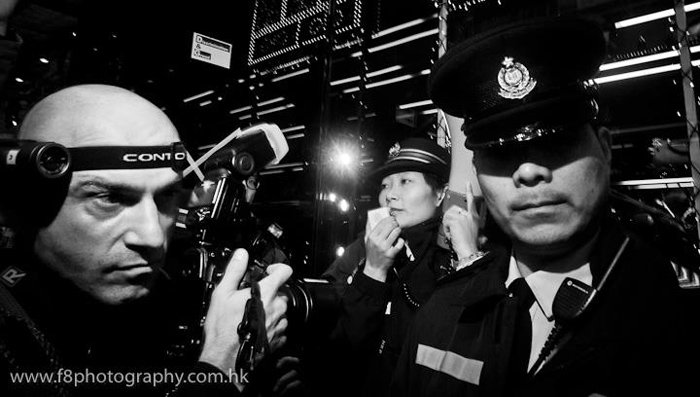
Both myself and Graham Uden, having previously served in Iraq as photographers were quite happy to stick on the headcams and dive straight in at the front, through the police line and get to the front of the action.  We managed to attract a fair bit of attention from the chinese news teams and photographers as there weren't many other westerners there apart from our small crew of professionals and regular RGB members including myself, Graham Uden, Carsten Schael, Angelo Costadimas, Viveck Bansal and Gareth Brown.

Graham undercover on 'Operation D&G'straight to the front door...

Graham gave some interviews to various TV and radio media who were keen to hear our views on the subject and we believe we achieved our aim by showing that this is not just an issue for the chinese, but equally for all photographers, no matter where they come from.

Graham conducting interviews

Other protestors were dressed up in different outfits to attract attention from the media, so the whole event was good for us as there were plenty of things to photograph during the protest.

female protestorfemale protestor dressed up...or down...

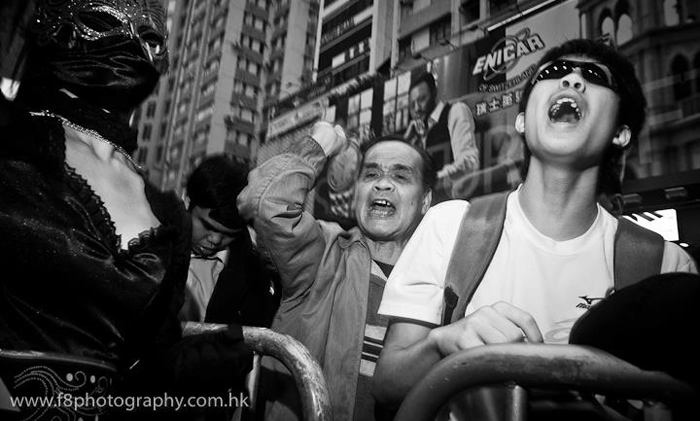
The protest went without any problems, we didn't see any representatives from D&G come outside to apologise at all, despite the repeated chants of 'apologise' in cantonese from the large crowd that had gathered....This clearly irritated the protesters as it showed more arrogance from the brand as they appear to be simply refusing to acknowedge the problem (at least during the time we were there, this was the case).

protestors getting vocalprotestors getting vocal

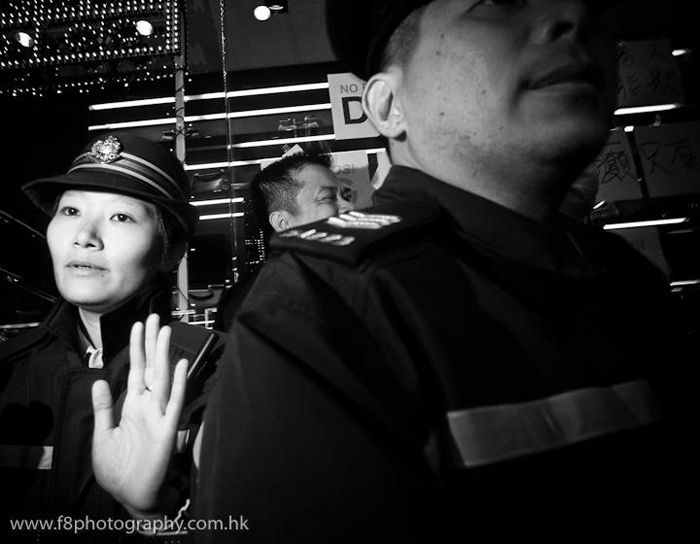
We commended the police on their manner during the protest, they were very polite and helpful towards us, and there was no violence during the protest, which is always good.

police controlling the crowd

here is the video of Graham talking to the press with a brief recap of the situation:

Thanks for taking the time to visit our blog, if you like our blog and website, please ‘like’ us on our public Facebook page and share this story with your friends with the Facebook and twitter links below.  You can also subscribe to our blog via the RSS link below.

F8 Photography provides commercial photography and training across Asia, with workshops on Street Photography and other photography and video training courses, more details can be found via the ‘courses and workshops’ link and upcoming events via the front page of our website.

Don't forget to print your images!

In this digital age, one of the things that us photographers tend to forget to do a lot of the time is to actually print our work. Its far too easy to edit the photos, stick them on a website or on facebook and never pay much attention to them again, this is fine, and is a sign of the times but its a really nice feeling to see our work in print, hanging on the wall

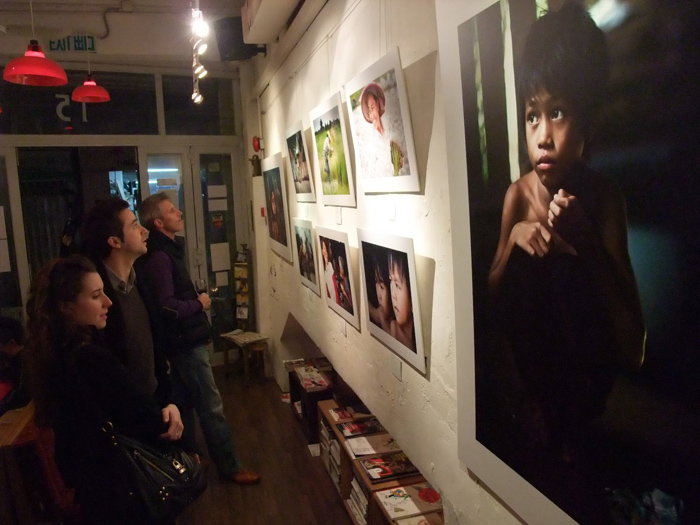
Last year we had an exhibition in Soho from our images we shot in Cambodia and it was the first time in a long time that I had made big prints.  This made me realise how much I appreciated seeing my prints hanging on a wall, they looked so different to on the screen, and since then, I have been more disciplined about printing some of my work and now have my home and office partly plastered with prints.

They don't need to be large like these exhibition prints were and here in Hong Kong you can have frames built at very reasonable prices, typically a 24"x16" print can be framed with non-reflective glass for around HK$400 (USD50) or less if you know where to go.

Quite a few of my friends and clients ask me where I have my prints done, so here is that information:

For our printing we tend to use one main printer in Wanchai, called Sigmax (www.sigmax.com.hk), (their website has map and contact details), they are an excellent printer, with friendly staff - ask for Alice, she is a charming and very helpful young lady who works there.

We usually get our work framed at the frame shop on Johnston Road, directly opposite the Pawn Pub (just aroung the corner from Sigmax), they also have a very good service and price range for any type of frame build.

RJ with Rocco's printsome of our images getting framedframe shop, Johnston Road

Here are some other images so you can see the size of prints that they print with ease at Sigmax, I have seen billboard posters being printed there, so size is no issue for them.

Me with 1 of my Cambodia images

Image courtesy of John Meldrum

So don't just stash all your images away on hard drives never to be seen again...print a few, hang them up and show off your work, be proud!  Something to note is the new version of Adobe Lightroom 4 is coming out shortly, they already have a FREE BETA version you can download here (just remember its not final version yet and only for testing).  One of the great new features within Lightroom is a 'book' module which is linked to Blurb where you can easily create photo books from your images, so I think we will all be seeing more printing of our images in the coming months!

Here is the link to our exhbition video from Soho earlier in 2011 should you wish to take a look at some of the other prints from that trip and see them hanging at the exhibition.

Thanks for taking the time to visit our blog, if you like our blog and website, please ‘like’ us on our public Facebook page and share this story with your friends with the Facebook and twitter links below.  You can also subscribe to our blog via the RSS link below.

F8 Photography provides commercial photography and training across Asia, with workshops on Street Photography and other photography and video training courses, more details can be found via the ‘courses and workshops’ link and upcoming events via the front page of our website.


Street Photography...underground

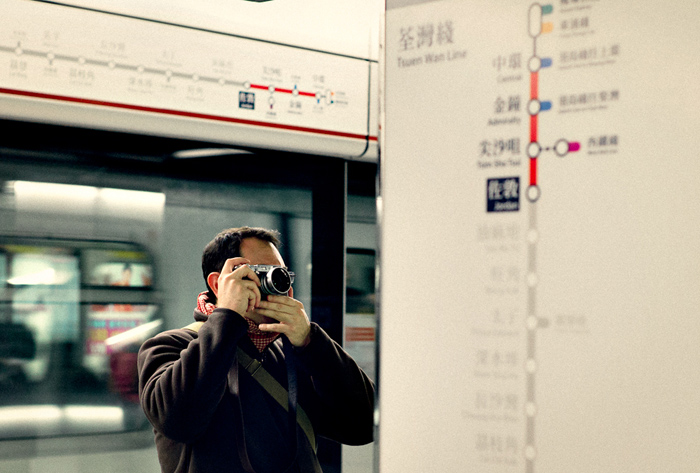
Something I hear a lot is "I went out shooting and there was nothing to see", well my honest reply is....."there is ALWAYS something to shoot", no matter where you are, there are always things to find of interest, be it people, buildings, landscapes or even subway station markings as was the case in subject for this little adventure... please mind the gapshooting in MTR

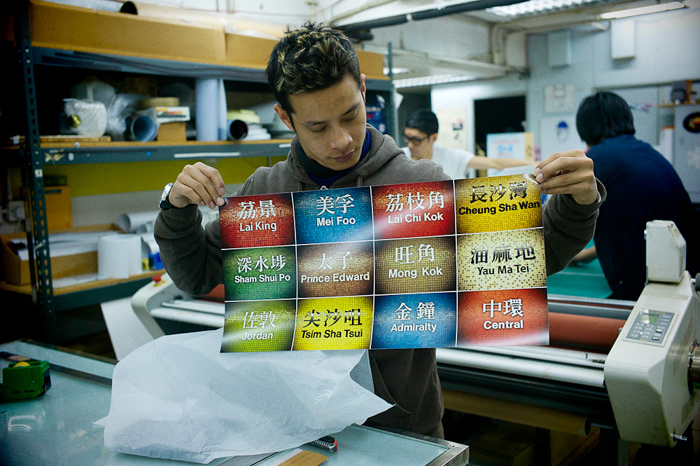
The subject of this post came about whilst we were out shooting street photography one day, we were spending a lot of time in-between our chosen locations on the Hong Kong MTR (subway/tube) then we came up with a quite random idea of shooting the station names at each stop and making a fine art print of it.  Now this is a subject that most of us in Hong Kong see every day, but somehow for me is much more interesting when seen in a collage type image because of the patterns and colours, etc.

collage of stationsrocco shooting the wall

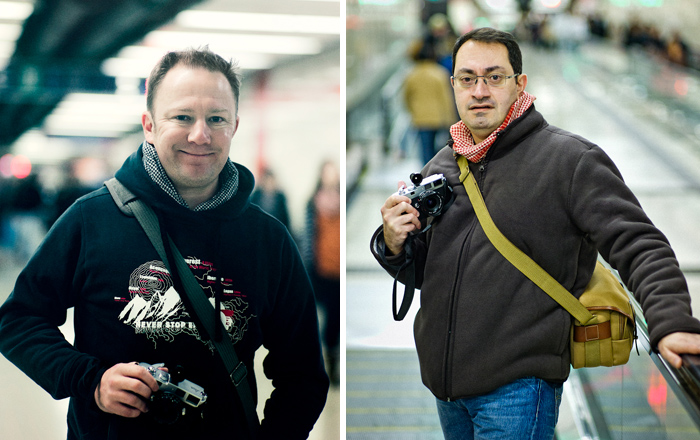
Rocco was using his trusty new found friend the Fuji X100 (he also uses the Leica M9 and for film shooting the Leica MP) and I was using the Leica M9 which I use exclusively for all my 'non-commercial' shooting.  All these cameras are absolutely perfect for shooting 'street photography' and anywhere where you need discretion, such as the MTR, due to their low profile size which is generally not intrusive or offending to people.  This is not to say that other cameras are no good, I personally think my Canon 5D Mark II image quality is second to none,  these are just our personal choices to achieve maximum image quality with a low profile camera in these environments.

Gary & Rocco on patrol

So, technical jargon aside, we photographed all the station names along the entire Tsuen Wan line (or red line), and along the way I photographed pretty much every sign, marking and logo I could find on and off the trains that was relative to the MTR experience, with the idea to produce some quirky images of the subject as can be seen in this image below.

composite of logos from MTR

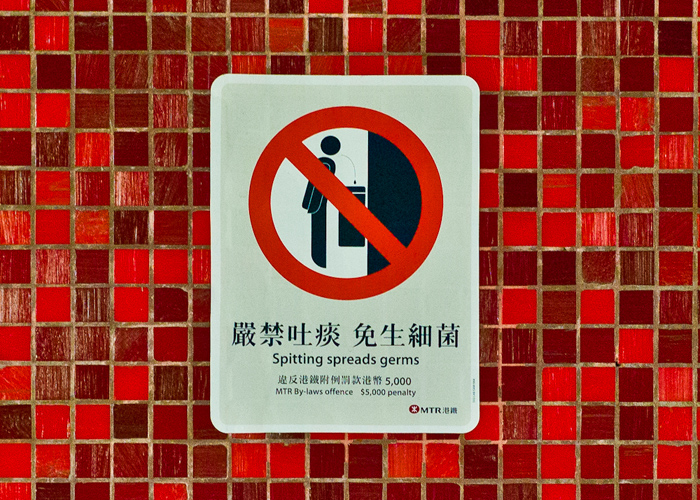
I think by the end of this day, we had shot far more images on the MTR system than we had on the street, and that's a good thing, as we shoot street photography several times a week already, so it makes a nice change.  Signs like the ones below I had never noticed before, 'no spitting'; you would think that is an obvious thing that people wouldn't need reminding to refrain from doing in an enclosed environment around other people!

no spitting please!

We spent a total of around 3 hours shooting the stations, in theory if it had been pouring down with rain outside, we could have shot this whole project without getting wet, so even on those types of days, this kind of thing would be a perfect little project to work on for something different - no excuses for not getting out taking pictures, wind, rain or shine!

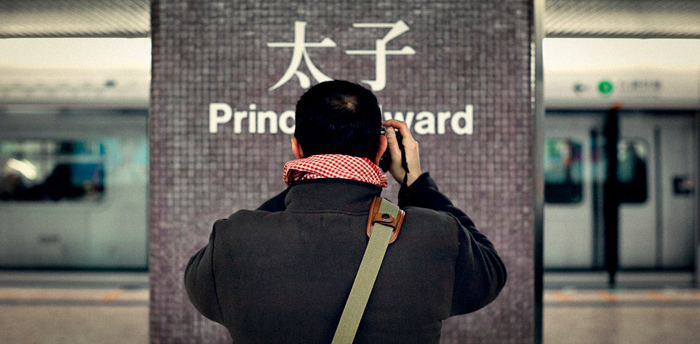
At Prince Edward Stationthe route

The message in this whole post is really about 'opening your eyes' to what is around you, we all rush around too fast, especially in these big cities where life's pace often overtakes us and gives us little time to absorb what is all around, but it is really important as a photographer to take the time to step back and observe, you really will surprise yourself if you can find the time to do this a few times a week, even if its only for half an hour, its an amazing world we live in, both in black and white and colour, so get out there, find something ordinary and make it extraordinary!

Upcoming blog posts will talk about where we print and frame our images here in Hong Kong, and the software we use to very quickly put together multiple images like in the montages above.

Thanks for taking the time to visit our blog, if you like our blog and website, please ‘like’ us on our public Facebook page and share this story with your friends with the Facebook and twitter links below.  You can also subscribe to our blog via the RSS link below.

F8 Photography provides commercial photography and training across Asia, with workshops on Street Photography and other photography and video training courses, more details can be found via the ‘courses and workshops’ link and upcoming events via the front page of our website.


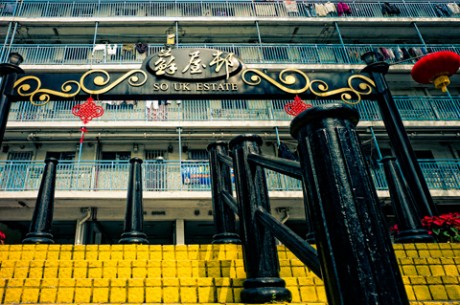
So Uk - The oldest government housing in Hong Kong

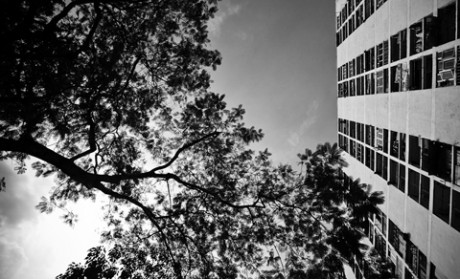
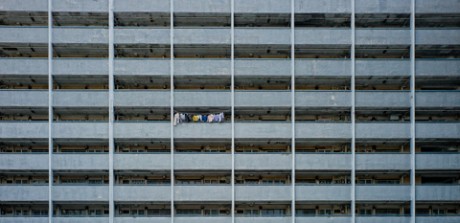
So Uk Estate entranceSunday morning, and myself and good friend and fellow Leica photographer 'Rocco' met up for a traditional English breakfast in Soho before deciding where to head out for some street photography on this pleasantly sunny but chilly Sunday morning. We decided to visit 'So Uk' in Cheung Sha Wan, reported as the oldest government housing estate in Hong Kong.  We thought it might make an interesting subject so we jumped on the MTR and headed off into Kowloon.

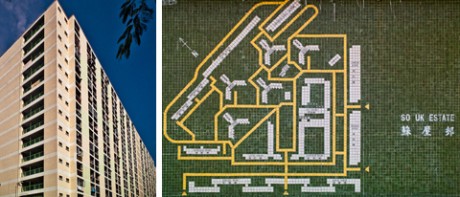
We did a little googling on the way to find out more information: the 16 block estate was constructed in 1960. Unlike many public housing estates built afterward, the architectural design of the estates is unique in Hong Kong. There are 5,316 flats in the estate, with capacity of 15,200.

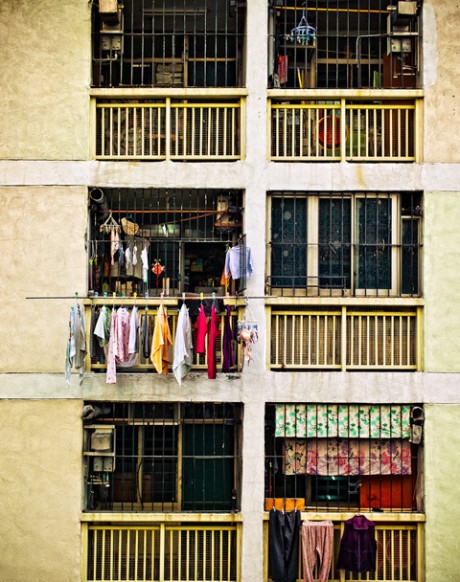
So Uk Estate and mapbalconiesview up to So Uk

Upon arrival I was slightly surprised, I thought it would look more 'run-down' being the oldest estate, but it was very well maintained and clean, a far stretch from any of the older government housing I could find in London or anywhere else in Europe for that matter!

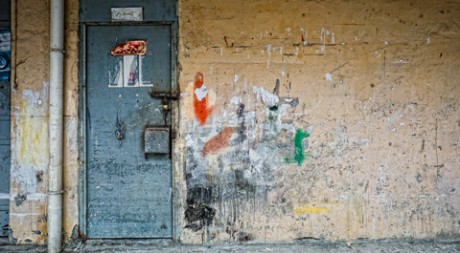
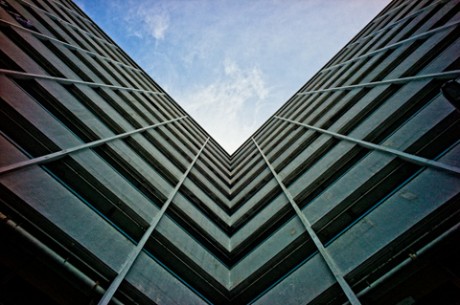
The kind of images I had in my mind before going to So Uk were 'texture', 'symmetry', 'shape'....  So At first I tried mainly to look for these kinds of images, which were everywhere to be found, as you will see later in the blog post though....I always seem to gravitate towards 'people' photography, no matter where I go, just can't help it!

'Gursky like' view of So UkSo Uk texturessymmetry

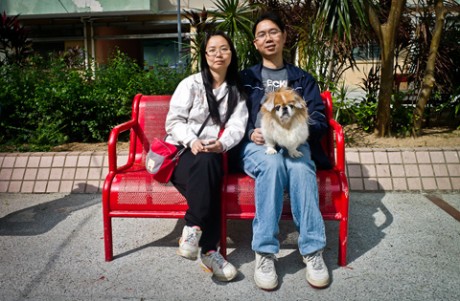
Another shock for me was that almost every single person i met spoke perfect English and were super-friendly towards us, maybe they don't see too many 'Gweilo's' (westerners) visiting the estate, I am not sure, but either way, it was very pleasant to be able to chat to many different people around the estate and find out a little about their life there.  The image below shows Pat, Harvey and their small Peking dog called 'Bun Bun'.

Harvey, Pat and Bun Bun

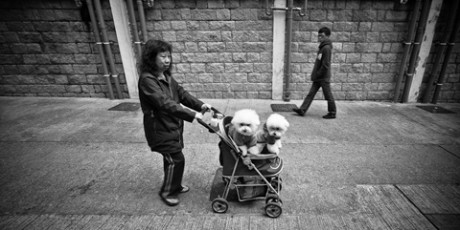
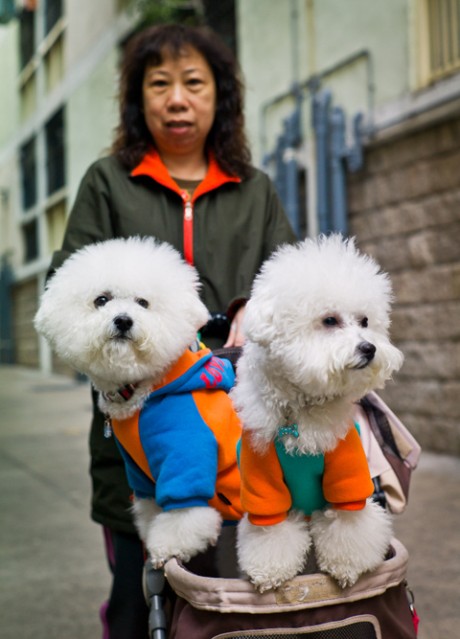
Another lady we met at the entrance to the estate was equally happy to chat to us, maybe she wanted to practice her English, I am not sure, but one thing for certain was everybody we met was more than hospitable towards us, at first I thought she was pushing her children or grandchildren in the a pram...then I realised it was two poodle dogs dressed up - amusing for us, and a common site around Hong Kong.

poodles out for a walk/ride...2 poodles in a pram!

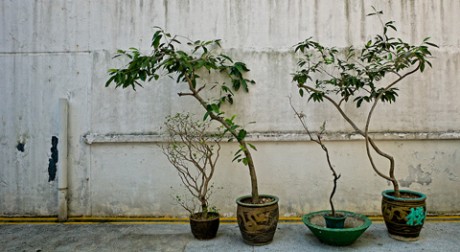
The children we encountered were equally keen to chat to us and asked to be photographed when they saw our cameras....Something else I noticed as there is not much 'green' space for gardening in these kind of places was the abundance of Bonsai trees decorating the entire area which also added to the serine peaceful feeling about the place.

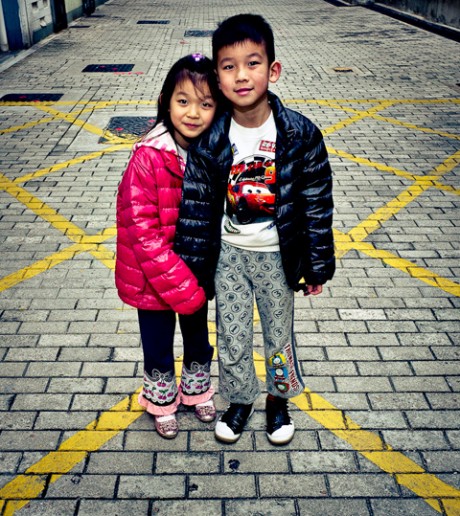
So Uk Bonsai TreesLocal kids in So Uk Estate

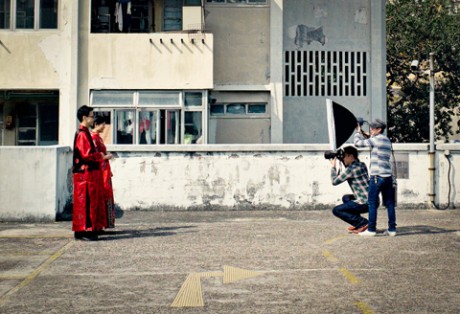
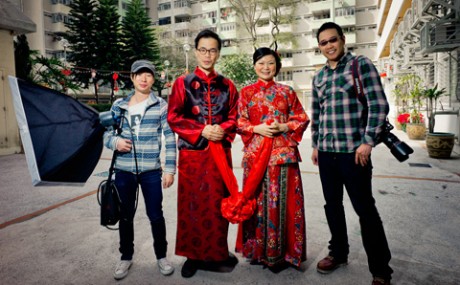
As we walked around, something else caught my eye - a pre-wedding photography shoot was happening on the roof of the car park!  I guess it makes sense as the place certainly has some contrasting views to the bright red costumes the bride and groom were wearing, so I approached them, had a little chat and asked if I could photograph them all together, as I find the costumes very interesting and again must emphasise the total friendliness of the people around this place.

pre-wedding shootpre-wedding shoot and the photographers

A few other individuals we met also chatted away to us at length and we met a group of young local photographers who were doing the same thing as us, just exploring the area, so we grabbed them for a quick photograph as well.

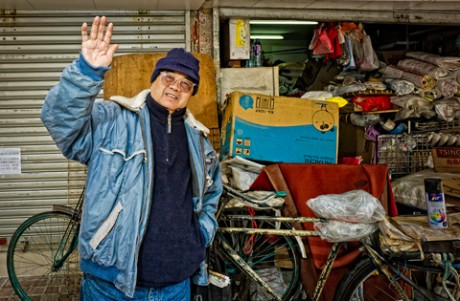
local man, So Uk EstateHong Kong youth exploring So Uk

So after a few hours in this wonderful part of Hong Kong, we stopped at the local 'cafe' for a hot coffee....perhaps this is the reason I don't live in this part of town.....it is way too far from the nearest Starbucks for me! :-)

coffee break

Thanks for taking the time to visit our blog, if you like our blog and website, please 'like' us on our public Facebook page also.

F8 Photography provides commercial photography and training across Asia, with upcoming workshops on Street Photography and other photography and video training courses, more details can be found via the 'courses and workshops' link via the front page of our website.

Street Photography Workshop with Eric Kim - 24th-26th Feb 2012

So its finally happening!  Eric Kim is flying in from LA to host with F8 Photography a 2 day Street Photography Workshop.

There are limited places, so sign up fast if you are interested, we expect this workshop to sell out quickly, as have all Eric's workshops in Asia and over the world.

The workshop will take place from the evening of Friday 24th until the evening of Sunday 26th February 2012.

All the even details and signup information for the event are here or at the following link and from the events shortcut on the front page of our site:

http://www.f8photography.com.hk/event/streetworkshoperickim/

F8 studio lighting workshop - review and feedback

A few weekends ago we held a studio lighting workshop for 2 of our previous clients; Craig and Bernhard, who last year completed the foundation course with F8. They have both been practicing hard and continuing to develop their passion for photography, adding a vast array of images to their portfolios of the last year or so, ranging from travel photography to family lifestyle portraits.

They had both arrived at a point in their photography where they felt it was the right time to broaden their horizons with artificial lighting, so we headed into the studio with 3 beautiful models early one Sunday morning and started playing with light meters, octaboxes and all the other great toys in the studio to see what we could achieve in a few hours of intensive training.

Bearing in mind that neither of the guys had ever set foot in a photography studio as the photographer before, we started with the basics; how to use light meters correctly, 1 light setup, using reflectors, flags and other light modifiers, then moving on to slightly more elaborate lighting setups, using gels, grids, snoots, barndoors, ringflashes and even wind machines amongst other tools.

After 5 hours of loud music, high energy photography and lots of laughter the whole crew was exhausted, even our models mentioned they didn't realise it can be quite tiring and hard work posing for a demanding photographer...haha.

Everyone involved said they had a positive experience and achieved a valuable piece of training to carry them forward with their photography, so I was happy, I had achieved my aim to teach them some new tricks and see everyone leaving the studio with big happy grins on their faces :-)

Using 3 cameras throughout the day, they had taken hundreds of images, I asked them afterwards to send me just a very small selection each, to show that they could also selectively choose and edit images as we would do so in a professional environment, being able to filter work down and produce only the top quality images, a task that is not as easy as it may sound.

I asked them both for a bit of feedback a week or so later and they said the following:

Craig Menzies:  "The studio shoot was a great experience and really focused on the full studio experience, from setting up the backdrops, all the various types of light modifiers, umbrellas and soft boxes, and where each light is placed to create dynamic lighting for the models we were photographing. It was fast paced and we learned a great deal from Gary’s instruction, while shooting amazing photos.  It was also a new experience to deal with models and directing them to create the shots we wanted.  Highly recommended and I will do more studio shoots in the future".

Bernhard Wamelink:  "The one day lighting workshop with Gary Tyson from F8 Photography was a great experience.  In a studio environment all the different aspects of studio lighting were discussed, set up and used in a shoot with models. Gary showed his professionalism in a relaxed way and he was very supportive and a good coach".

We provide a variety of training ranging from foundation training, street photography, DSLR video training and studio lighting.  Details can be found via the links on our home page here. or you can contact us directly from the contact page here.

Here are a selection of images from both Bernhard and Craig's first ever studio shoot:

Here are some additional links to their existing portfolios if you wish to see more of their photography:

Link to Bernhards 500px portfolio

Link to Craig's 500px portfolio

Photographer rights in public spaces

A good friend of mine sent me this link earlier, which I thought was important to share as we have all been in the situations shown in this video. A lot of photographer are completely unaware of their rights when shooting in public places, be it street photography, architectural photography or even just shooting there friends and then having trouble with security guards, locals, etc.

Of course you must remember that shooting in private spaces, i.e. shopping malls, etc the rules are different.

Video Link: Stand your ground


Spiders and Speedlights...using off camera flash

The last few days when I've been out jogging I found some BIG spiders hanging in the bushes on the mountain.... As scary as they are to me, I thought it would be kinda cool to take a few pics of them at some point.  I did a bit of research online to find out what kind of spiders they are, and it seems they are called Golden Orb Weaver Spiders, here's the (wikidpedia link if interested), they do have neurotoxin venom which is dangerous but not lethal to humans....here is an image showing the spider and how it gets it name from the golden orb you can see clearly at the base of its back.

Anyway, the purpose of this blog post is not a wildlife lesson, but more a quick insight into using speed-light flash (off camera) and how it can be used to enhance or help light a subject and how we balance the 'ambient' light.  One of our trainee assistant photographers called RJ is learning more about flash work and he also has a big interest in macro photography and wildlife so I thought he would be the perfect candidate to practice some flash techniques with these spiders and help him to learn flash balancing at the same time.  Everything to do with flash and balancing light applies exactly the same if you are photographing insects, humans, or anything else for that matter.

So, we set off on the trail, and as there had been a typhoon the day before, I was not optimistic about finding any spiders due to their webs having been broken up by the wind, but sure enough after 30 minutes we found loads of these monsters!  These critters look pretty hardcore to me and clearly aren't concerned with Typhoon 8 weather...

The idea of the trip out was to show that flash and ambient light can easily be controlled separately.  Once an exposure is attained, to get more light in the background (ambient light), all you need to do is adjust the shutter speed slower - to make the background darker you just do the opposite and adjust the shutter speed faster.

The first test shot RJ did on a caterpillar demonstrates a fast shutter speed (1/200th), which cancels out all of the ambient light (daylight/light source other than flash)...This caterpillar was in broad daylight but the effect achieved is show below. (bear in mind on most DSLR cameras you are still limited to maximum shutter speed of approx 1/200th of a second whilst using flash (will differ slightly for different camera models), otherwise the shutter will close before the flash has finished exposing and effectively chop your picture in half).  When using the flash on the camera, your camera will not let you shoot faster than its maximum 'sync speed' to help prevent this problem, unless you have high speed flash features enabled.

Once we found some of the big spiders, RJ tested out this theory again, firstly attaining a rough exposure with the flash and ambient light, and then adjusting only his shutter speed to effectively darken or lighten the background for different effects in each picture as shown below:

The other technique that I wanted to emphasize to RJ was using side lighting and back lighting with the flash....this can help give shape and texture to your subject and in this case really helped bring out the details in the web....if we were shooting portraits of people we could use this technique to emphasise shape, texture, hair details, etc, etc....its all the same idea, just applied to each subject how you like.

This next picture RJ shot shows a real close up of the back of the spiders head....we both agreed the damn thing looked like it was wearing the famous hockey mask that Jason wears in the 'Friday the 13th' horror movies...as if it wasn't already scaring us enough!....

Something we did in this picture as the flash was very close to the spider was to put some white tissue paper in front of the flash head which helps to soften the light like a 'mini-cloud' giving a diffused light effect...there are many props you can buy to achieve this effect, but especially for macro, sometimes a simple piece of tissue can do the same job!


This last shot won't be too everybody's taste...but RJ found it interesting...to see this poor grasshopper looking insect had come to a very sticky end.....gives me goosebumps to see this close up....but again, the flash has really helped bring out the detail in the shot.

I hope this short post can be useful to anyone learning flash, it shows u can practice flash techniques on anything, doesn't need to be portraits, you can shoot anything at home or outdoors and learn these important techniques to balance flash with the ambient light.

Just remember, shutter speed will control your ambient light, and flash power can be controlled by the flash unit, bringing the flash closer or further away from the subject, or by adjusting your aperture (when using manual flash) to change the amount of light that reaches the subject from the flash (of course adjusting aperture will also effect ambient light).  Adjusting your ISO will effect everything, making the sensor more or less sensitive to light, therefore affecting all light sources in your scene.

If you found this post useful, please click the 'LIKE' button, maybe subscribe to our blog or other social media via the links below and please feel free to leave us your comments.